

The Cooler Master T400i is a popular CPU cooler known for its excellent performance and affordability. However, some users might find its fan bracket a bit tricky to install, especially when using a custom fan setup. This comprehensive guide will walk you through everything you need to know about the Cooler Master T400i fan bracket, from its functionality to installation tips and common issues.
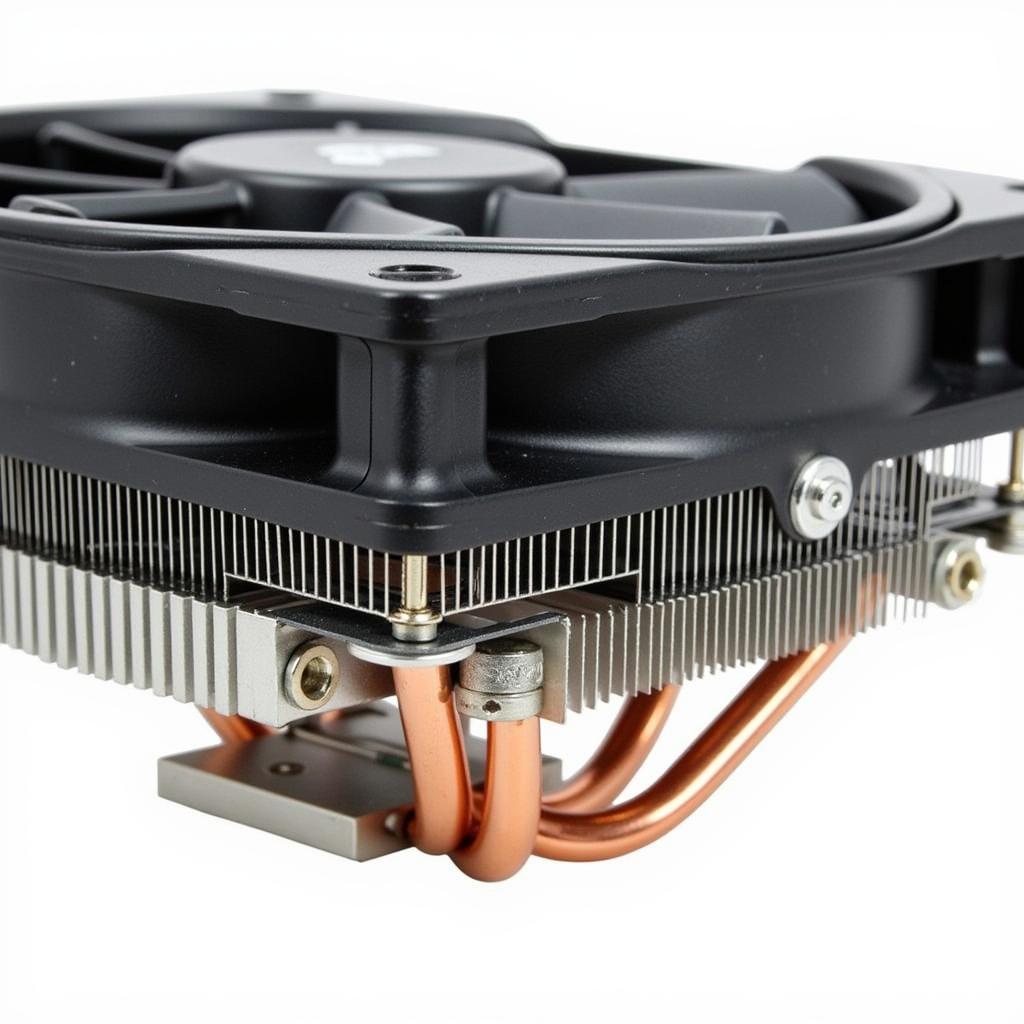 Cooler Master T400i Fan Bracket Overview
Understanding the Cooler Master T400i Fan Bracket
The fan bracket is an essential component of the T400i cooler, allowing you to attach one or two fans to the heatsink. It provides a secure mounting point and ensures optimal airflow for efficient heat dissipation. The bracket is typically made of sturdy metal, often steel or aluminum, and is designed to be compatible with standard 120mm fans.
Installation Process: Step-by-Step Guide
Installing the Cooler Master T400i fan bracket is a straightforward process, even for beginners. Here’s a detailed step-by-step guide to help you:
- Prepare Your Workspace: Find a clean, well-lit area to work. Gather your Cooler Master T400i cooler, fan bracket, screws, a screwdriver, and your chosen 120mm fan(s).
- Align the Bracket: Position the fan bracket on the heatsink, ensuring the mounting holes align.
- Secure the Bracket: Use the provided screws to attach the fan bracket to the heatsink. Don’t tighten them completely yet; leave some room for adjustments.
- Install the Fan: Place your 120mm fan on the bracket, aligning it with the mounting holes.
- Secure the Fan: Use the fan screws to secure the fan to the bracket. Tighten the screws gradually, ensuring even pressure.
- Repeat for Second Fan (Optional): If you’re installing a second fan, repeat steps 4 and 5.
- Final Tightening: Once everything is in place, carefully tighten all the screws, ensuring the bracket and fan(s) are securely attached.
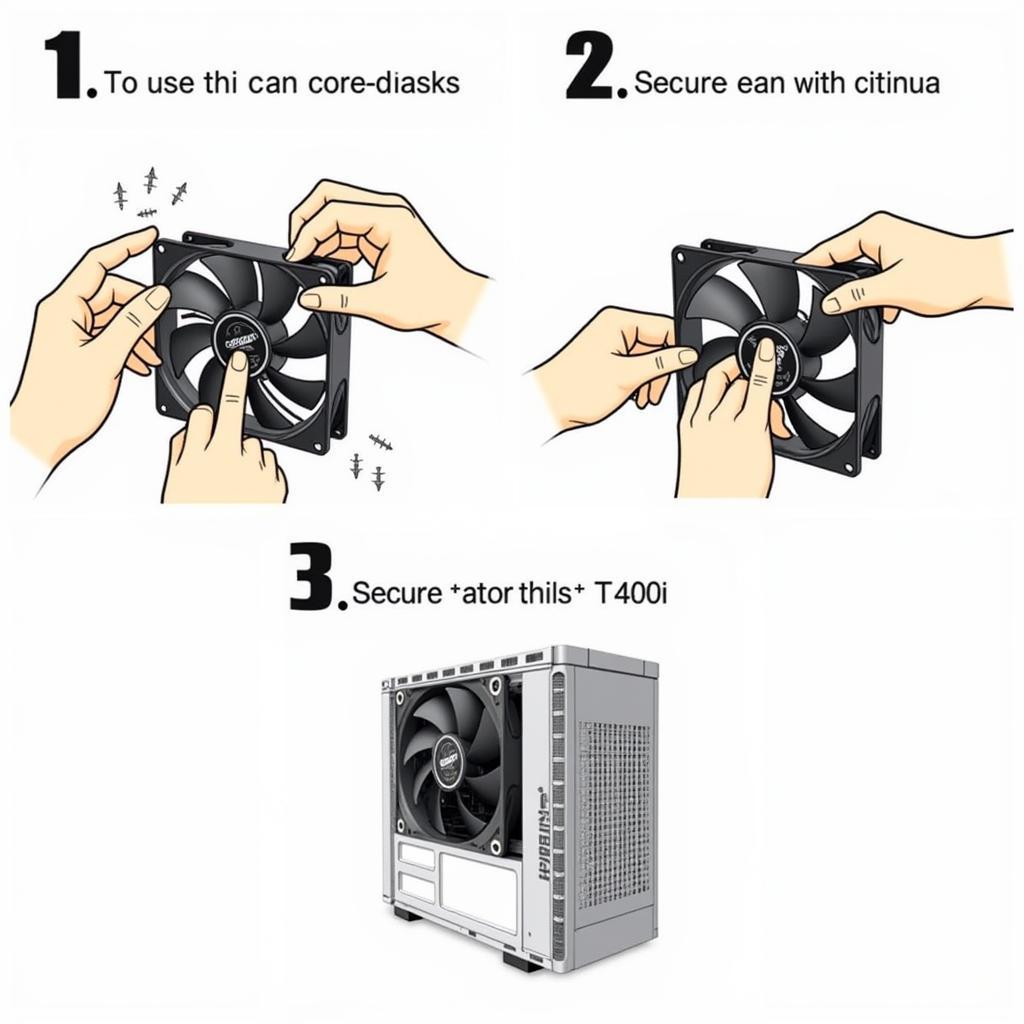 Installing Fan on Cooler Master T400i Bracket
Common Issues and Troubleshooting
While the installation is generally straightforward, you might encounter a few common issues:
- Misaligned Screws: This usually happens if the bracket or fan isn’t correctly aligned. Ensure all the mounting holes are lined up before tightening the screws.
- Loose Bracket: Make sure all the screws are tightly fastened. A loose bracket can cause rattling noises and affect cooling performance.
- Fan Clearance Issues: Ensure your chosen fan doesn’t interfere with other components on your motherboard, such as RAM modules or the CPU cooler itself.
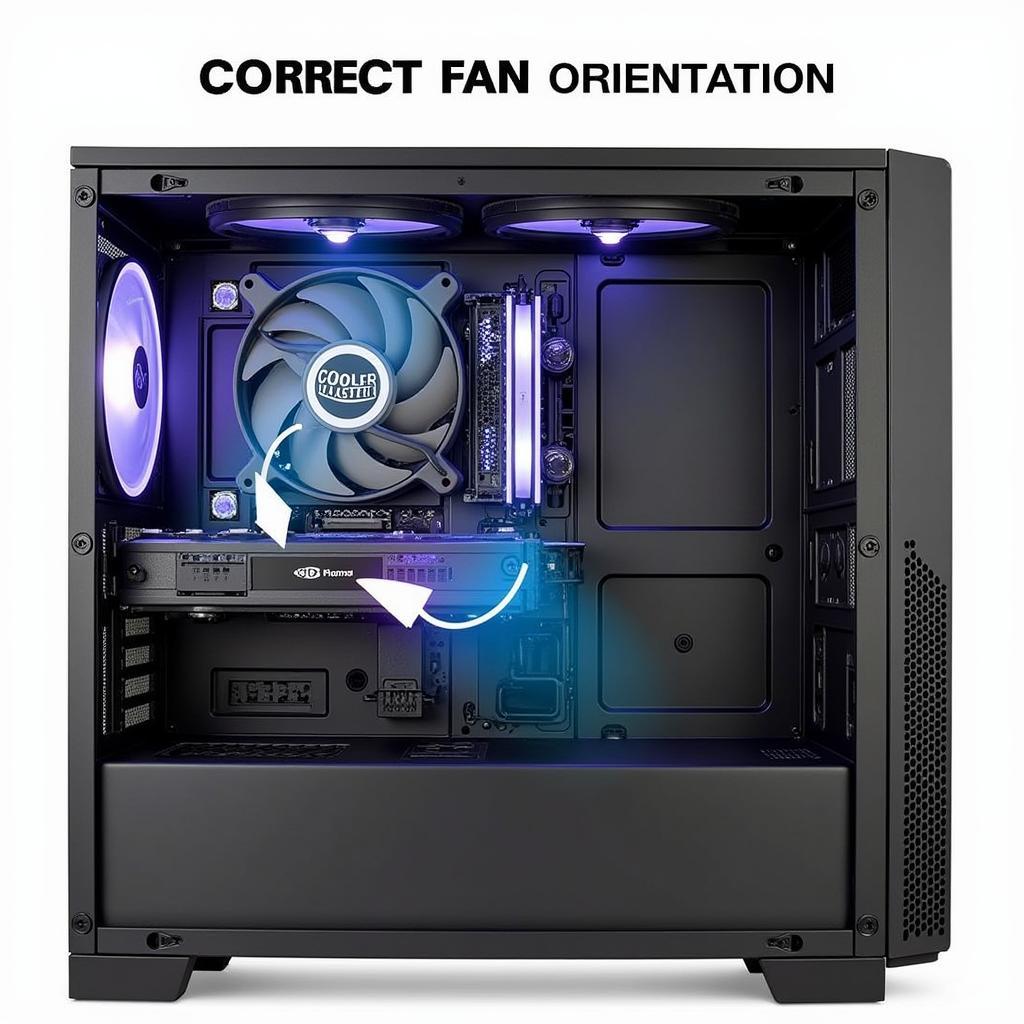
Tips for Optimal Performance
- Fan Orientation: For optimal airflow, install the fan so that it pulls air through the heatsink and exhausts it towards the rear of your PC case.
- Thermal Paste: Apply a small pea-sized amount of thermal paste to the CPU before installing the cooler.
- Cable Management: Keep fan cables tidy to prevent airflow obstruction and ensure a clean build.
 Cooler Master T400i with Dual Fan Setup
Conclusion
The Cooler Master T400i fan bracket plays a crucial role in maximizing the cooler’s effectiveness. By following the steps in this guide, you can easily install the bracket and enjoy improved CPU cooling for your system. Remember to choose compatible fans, ensure proper alignment, and keep the bracket securely fastened for optimal performance.
FAQ
Q: Can I use any 120mm fan with the Cooler Master T400i bracket?
A: While the bracket is designed for 120mm fans, it’s essential to check the fan’s thickness and screw hole spacing for compatibility.
Q: Do I need to use both fan slots on the bracket?
A: Using a single fan is sufficient for most systems. However, adding a second fan can further improve cooling performance, especially during demanding tasks.
Q: I’ve installed the bracket, but my fan is making a rattling noise. What should I do?
A: Check if all the screws are tightened properly. A loose screw can cause vibrations and noise. Also, ensure the fan blades aren’t hitting any cables or components.
Need more assistance? Contact us at Phone Number: 0903426737, Email: [email protected] Or visit our address: Group 9, Area 6, Gieng Day Ward, Ha Long City, Gieng Day, Ha Long, Quang Ninh, Vietnam. Our customer support team is available 24/7 to assist you.
