

A clutch coolant fan plays a vital role in regulating your engine’s temperature. It draws air through the radiator to prevent overheating, particularly during idling or low-speed driving. When the clutch fan malfunctions, your engine is at risk of overheating, potentially leading to costly repairs. This guide will walk you through the steps to diagnose and repair a faulty clutch coolant fan.
Understanding the Clutch Fan System
Before diving into the repair process, it’s essential to understand how the clutch fan system works. Unlike conventional fans that run continuously, a clutch fan engages only when needed, improving fuel efficiency and reducing noise. The system consists of:
- Fan Clutch: A thermo-viscous coupling mounted on the water pump pulley. It engages and disengages the fan based on the engine’s temperature.
- Fan Blade: Attached to the fan clutch, it draws air through the radiator.
- Thermostat: Monitors engine temperature and signals the fan clutch to engage when a certain temperature is reached.
Common Symptoms of a Failing Clutch Fan
Recognizing the signs of a failing clutch fan is crucial for early diagnosis and repair:
- Overheating Engine: This is the most obvious symptom. If your engine temperature gauge consistently reads high, especially during idling or slow traffic, your clutch fan might be faulty.
- Loud Roaring Noise from the Engine Bay: A failing fan clutch can produce a loud roaring noise, especially when the engine is first started or under acceleration.
- Decreased Fuel Efficiency: A constantly engaged fan creates drag on the engine, leading to reduced fuel economy.
- Wobbling or Loose Fan: Physical damage to the fan or clutch can cause wobbling or looseness, often accompanied by unusual noises.
How to Diagnose a Clutch Fan Problem
To confirm if your clutch fan is the culprit, perform these diagnostic tests:
- Visual Inspection: Check for any visible damage to the fan blades, such as cracks, bends, or missing pieces. Additionally, inspect the fan clutch for signs of leaks or physical damage.
- Spin Test: With the engine off and cool, try to spin the fan blade by hand. If it spins freely with little resistance, even when cold, the fan clutch is likely faulty and needs replacement.
- Temperature Test: Start the engine and let it idle. Monitor the engine temperature gauge closely. If the temperature rises above normal operating levels and the fan doesn’t engage, the clutch fan is likely the problem.
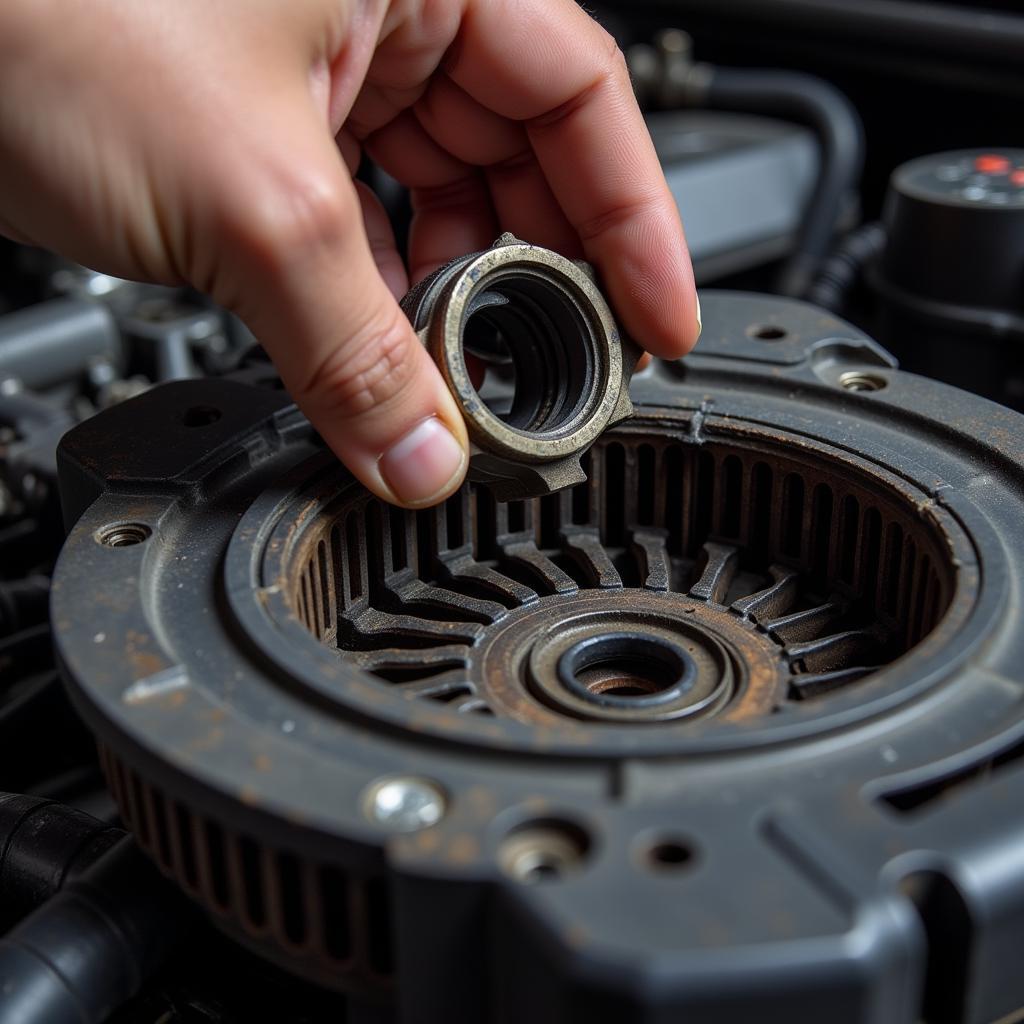 Inspecting a Clutch Fan
Steps to Repair a Clutch Coolant Fan
Replacing a clutch fan is a relatively straightforward procedure that can be done with basic tools:
Tools You’ll Need:
- Ratchet and socket set
- Screwdriver
- Wrench set
- Fan clutch holding tool (optional)
- New fan clutch
- Coolant
Repair Procedure:
- Safety First: Disconnect the negative battery cable before starting any work to prevent electrical shocks.
- Drain the Coolant: Place a drain pan under the radiator drain plug and open the plug to drain the coolant.
- Remove the Fan Shroud: Depending on your vehicle model, you may need to remove the fan shroud to access the fan clutch.
- Secure the Fan: If you have a fan clutch holding tool, use it to hold the fan pulley in place while loosening the fan clutch nut. If not, you can use a large adjustable wrench or a strap wrench to hold the pulley.
- Remove the Fan Clutch: Using a wrench, loosen and remove the fan clutch nut in a counterclockwise direction. Carefully remove the fan clutch and blade assembly from the water pump pulley.
- Install the New Fan Clutch: Apply a small amount of engine oil to the water pump shaft and threads of the new fan clutch. Align the new clutch and carefully thread it onto the water pump shaft. Tighten the fan clutch nut to the manufacturer’s specified torque.
- Reassemble and Refill: Reinstall the fan shroud, reconnect the radiator drain plug, and refill the cooling system with the recommended coolant type and concentration.
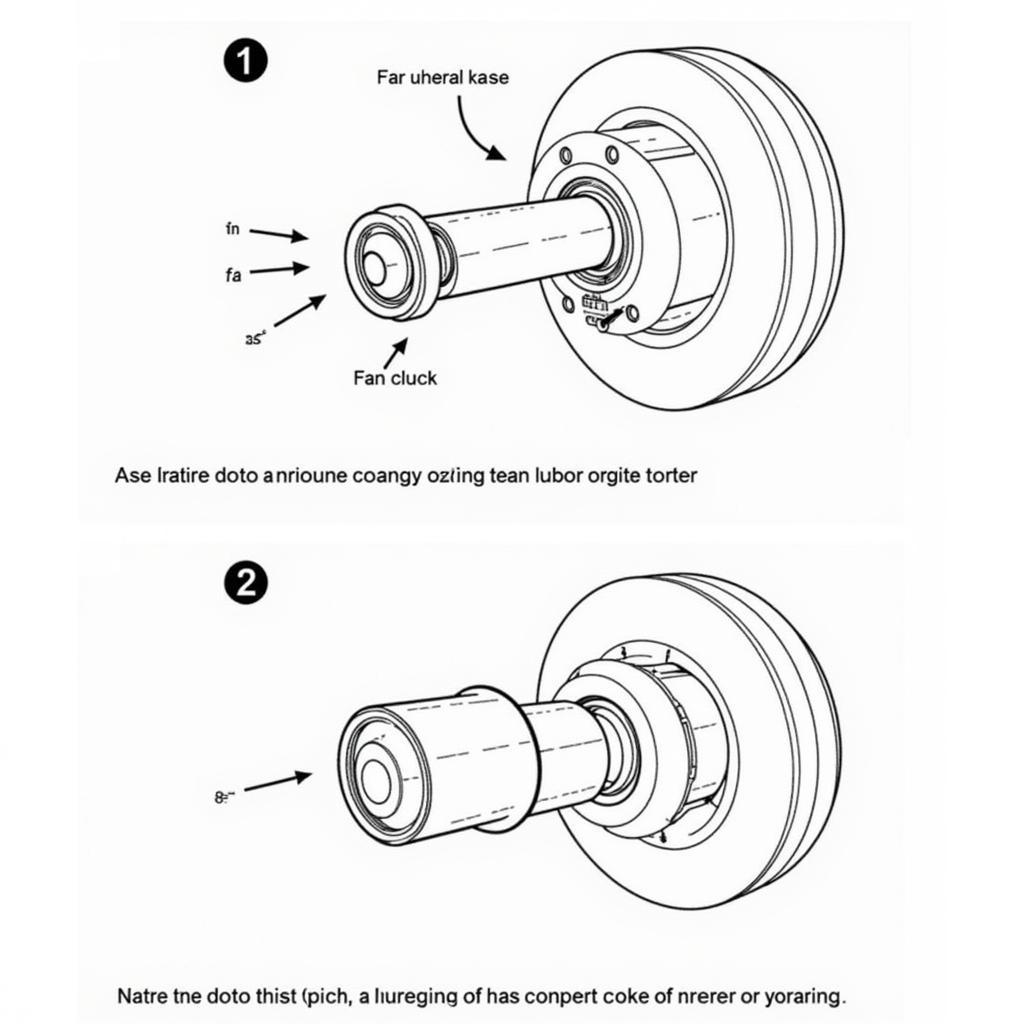 Installing a New Clutch Fan
Tips for a Successful Repair
- Consult Your Vehicle’s Repair Manual: Refer to your vehicle’s specific repair manual for detailed instructions and torque specifications.
- Use High-Quality Parts: Invest in a high-quality replacement fan clutch from a reputable brand to ensure optimal performance and longevity.
- Proper Coolant Mixture: Use the correct coolant type and concentration for your vehicle to prevent corrosion and ensure efficient heat transfer.
- Regular Maintenance: Regularly inspect your fan and clutch for signs of wear and tear. Replace them at the first sign of any problems.
Conclusion
A properly functioning clutch coolant fan is crucial for maintaining your engine’s health and preventing costly overheating issues. By understanding the symptoms of a failing fan clutch and following the repair steps outlined in this guide, you can confidently address this common automotive problem. Remember to prioritize safety, consult your vehicle’s repair manual, and use high-quality parts for a successful and long-lasting repair.
