

Creating your own cardboard hand fan is a fun and easy project that’s perfect for a hot day, a crafty afternoon, or even as a unique gift idea. Not only is it a budget-friendly way to stay cool, but it also allows you to unleash your creativity with personalized designs. Whether you’re a seasoned DIY enthusiast or just looking for a simple and rewarding activity, this guide will walk you through the steps to make a sturdy and stylish cardboard hand fan.
Gathering Your Fan-Making Supplies
Before you begin your fan-tastic crafting journey, gather these simple materials:
- Cardboard: The thicker, the better! A cereal box or a sturdy shipping box works great.
- Decorative Paper: Choose your favorite patterns or colors to give your fan a personal touch.
- Scissors: Sharp scissors will ensure clean cuts for both the cardboard and paper.
- Glue Stick or Double-Sided Tape: These are essential for attaching the decorative paper to the cardboard.
- Ruler and Pencil: Precision is key! These tools will help you create straight lines and evenly spaced sections.
- Decorative Embellishments (Optional): Get creative with ribbons, buttons, glitter, or anything else that sparks joy!
Step-by-Step Instructions to Craft Your Fan
Ready to transform simple cardboard into a work of art? Follow these steps:
-
Prepare the Cardboard: Cut out a rectangular piece of cardboard. The size can vary depending on your preference, but a good starting point is around 10 inches by 14 inches.
-
Create the Fan Blades: Lay the cardboard horizontally and, using your ruler and pencil, lightly mark vertical lines across the cardboard. These lines will guide your folds and create the fan blades. Aim for about 1-inch spacing between each line.
-
Fold Along the Lines: Carefully fold the cardboard along each marked line, alternating the direction of the fold (inward, outward, inward, outward) to create the accordion-like folds of a fan.
-
Secure the Base: Once satisfied with your folds, apply glue or double-sided tape to one of the outer sections of the folded cardboard. Carefully align and press the other outer section onto the glued area, securing the base of the fan.
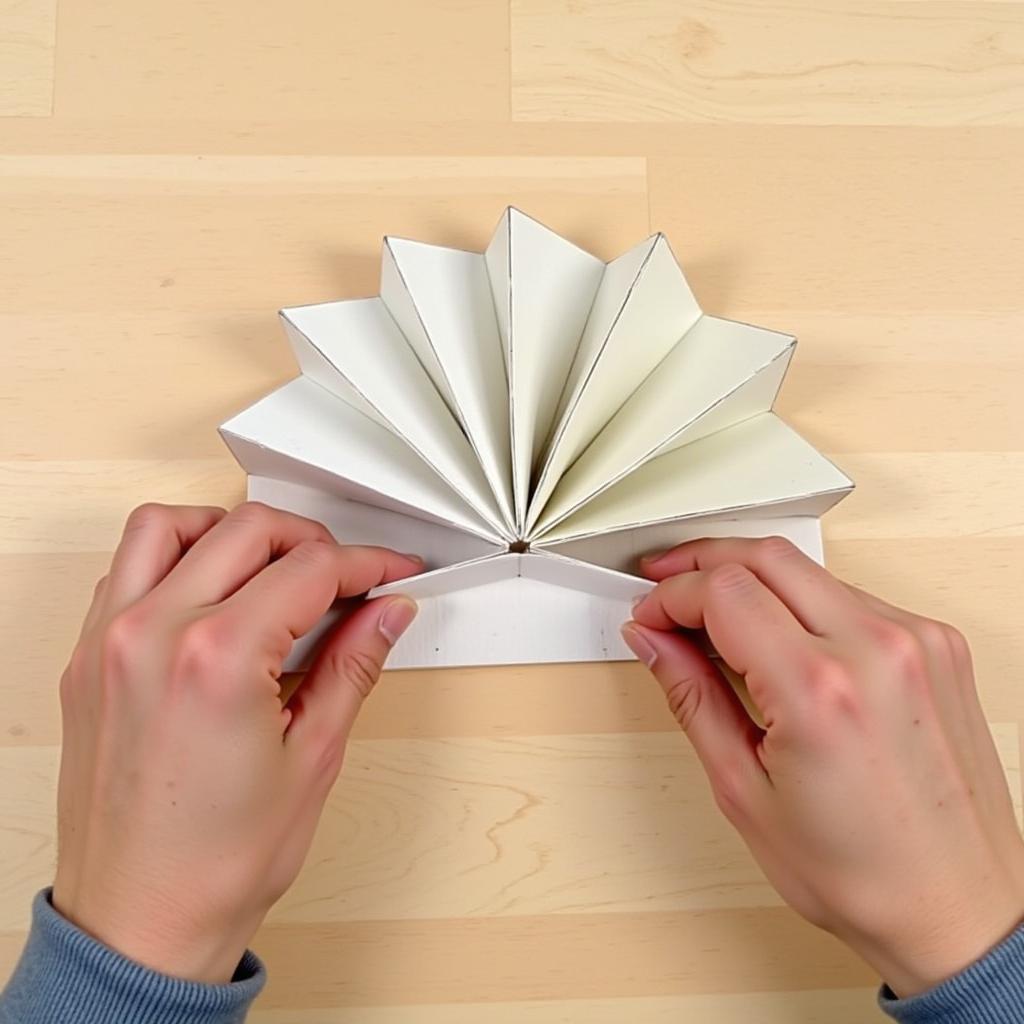 Folding a cardboard fan
-
Decorate Your Masterpiece: This is where your creativity shines! Cut your chosen decorative paper to size and glue it onto both sides of the folded cardboard, covering the entire surface.
-
Add a Touch of Flair: Let your personality shine through! Glue on ribbons, buttons, or other embellishments to make your fan uniquely yours.
-
Let It Dry: Once you’ve added all your decorative elements, allow the glue to dry completely before using your fan.
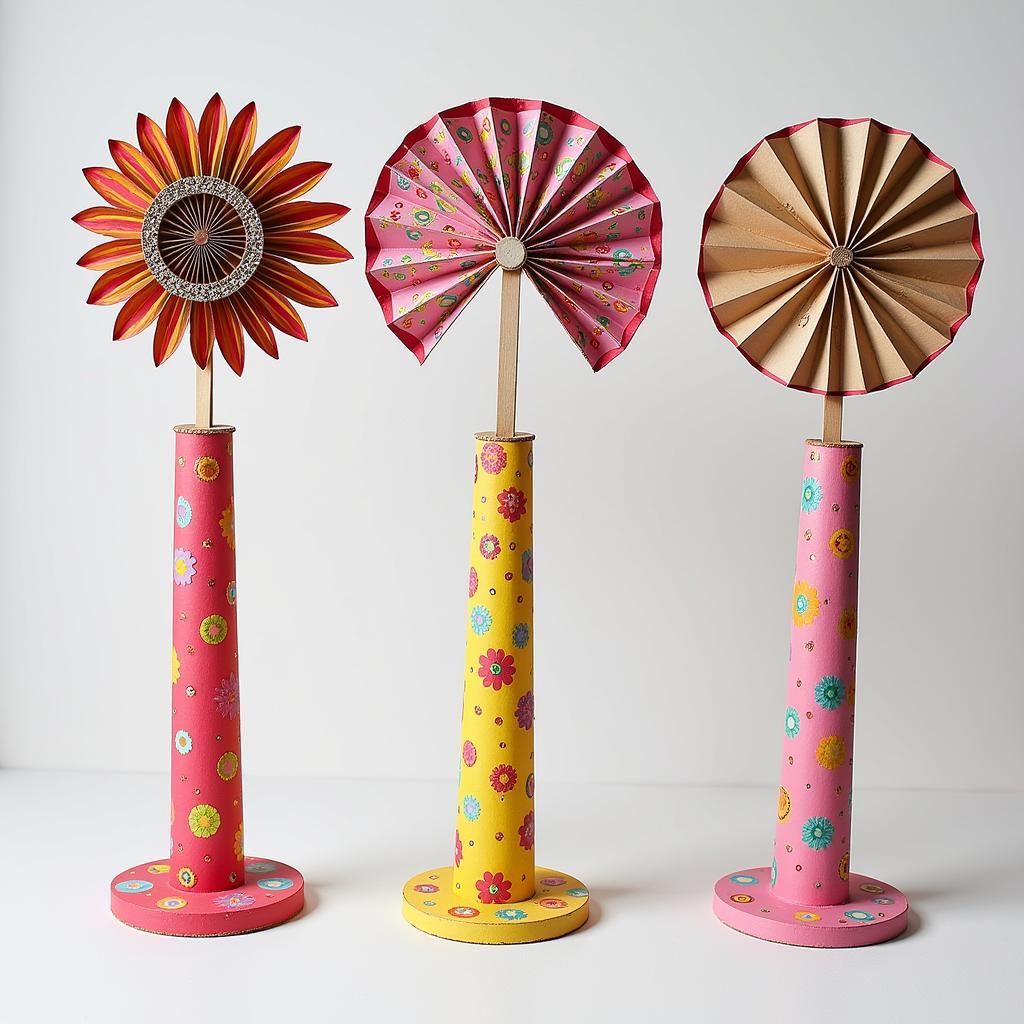 Finished cardboard fans
Tips for Fan-tastic Results
- Experiment with Different Materials: Don’t limit yourself to just cardboard and paper. Try using fabric scraps, felt, or even thin foam sheets for a different look and feel.
- Get Creative with Shapes: Who says a fan has to be rectangular? Cut out circles, hearts, or other shapes for a more whimsical effect.
- Make It a Group Activity: Gather your friends and family for a fun crafting session! Everyone can personalize their own fans and enjoy the cool breeze together.
Making a cardboard hand fan is an enjoyable and rewarding project that combines creativity and practicality. With a few simple materials and your imagination, you can craft a personalized fan that’s perfect for beating the heat in style.
