

The H61 ASUS motherboard is a popular choice for budget-minded PC builders. It offers a solid foundation for a gaming or productivity system, and one of its key features is its support for case fans. But how many fan headers does the H61 ASUS motherboard have, and what types of fans can you use?
 ASUS H61 motherboard with labeled fan headers
Understanding Fan Headers on Your H61 ASUS Motherboard
The number of fan headers on an H61 ASUS motherboard can vary depending on the specific model. However, most boards will have at least two fan headers:
- CPU Fan Header: This header is specifically designed for the CPU cooler and is typically located near the CPU socket.
- System Fan Header (SYS_FAN): This header is intended for case fans and can be used to connect one or more fans.
Some H61 ASUS motherboards may have additional fan headers, such as:
- Chassis Fan Header (CHA_FAN): Similar to the system fan header, this header is also for case fans.
- Power Fan Header (PWR_FAN): This header is intended for a fan that cools the motherboard’s voltage regulator module (VRM).
To determine the exact number and type of fan headers on your specific H61 ASUS motherboard, it’s best to consult the user manual.
Types of Case Fans Supported
The H61 ASUS motherboard supports both 3-pin and 4-pin case fans.
- 3-pin fans connect to the motherboard via a 3-pin connector and their speed is controlled by voltage regulation.
- 4-pin fans use pulse-width modulation (PWM) for more precise speed control.
While the H61 ASUS motherboard can technically support both types of fans, it’s generally recommended to use 4-pin PWM fans for optimal performance and noise levels. PWM fans allow for more granular control over fan speeds, enabling your system to run cooler under load while remaining quieter when idle.
Configuring Fan Speeds in the BIOS
The H61 ASUS motherboard’s BIOS allows you to monitor and control the speed of your case fans. You can access the BIOS by pressing the “Delete” or “F2” key during startup.
Within the BIOS, navigate to the “Hardware Monitor” or “Power” section. Here, you’ll find options to:
- Monitor fan speeds: You can see the current RPM (revolutions per minute) of your fans.
- Set fan speed profiles: Choose from pre-defined profiles or customize your own to adjust fan speeds based on temperature readings.
- Enable or disable fan control: You can choose to manually set fan speeds or let the motherboard automatically control them.
Optimizing Case Fan Setup for Optimal Cooling
For the best cooling performance, it’s important to consider both the number and placement of your case fans.
- Intake fans bring cool air into the case.
- Exhaust fans expel hot air from the case.
Ideally, you should aim for a balanced airflow configuration with a slightly higher intake than exhaust. This creates positive air pressure within the case, which helps prevent dust buildup.
For example, a common configuration for a standard ATX case is to have:
- Two intake fans: One at the front and one at the bottom of the case.
- One exhaust fan: Located at the rear of the case.
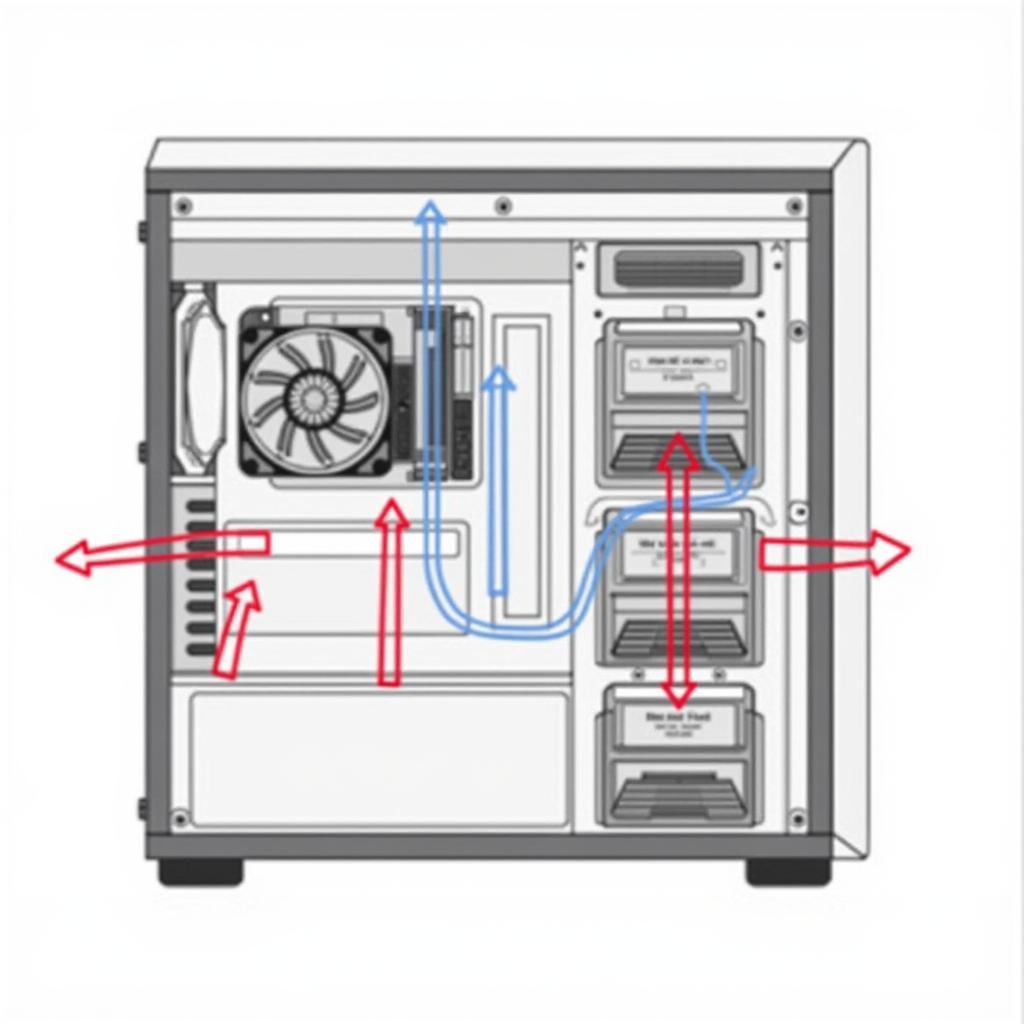 Illustration of optimal case fan placement for airflow
By following these guidelines and utilizing the fan control options in your H61 ASUS motherboard’s BIOS, you can ensure that your system stays cool and stable even under demanding workloads.
