

Building a PC goes beyond just raw performance. Aesthetics play a crucial role, and nothing elevates the visual appeal of your rig like vibrant RGB lighting. While installing components and managing cables can seem daunting, connecting your RGB fan to your ASUS motherboard is a surprisingly straightforward process. This guide will illuminate every step, ensuring your system not only runs cool but also looks dazzling.
Understanding Your RGB Ecosystem
Before diving into the connection process, it’s essential to familiarize yourself with the types of RGB headers on your ASUS motherboard and the corresponding connectors on your RGB fan.
Identifying Your RGB Headers
ASUS motherboards typically feature two primary RGB headers:
- 12V 4-pin RGB Header: This header, often labeled “RGB_HEADER” or similar, controls 12V 4-pin RGB devices. It uses a 4-pin connector with the following pinout: +12V, R, G, B.
- 5V 3-pin Addressable RGB Header: Denoted as “ADD_GEN1,” “ADD_GEN2,” or “ARGB_HEADER,” this header controls individually addressable RGB LEDs. It uses a 3-pin connector with the pinout: +5V, D, NC (Not Connected), G.
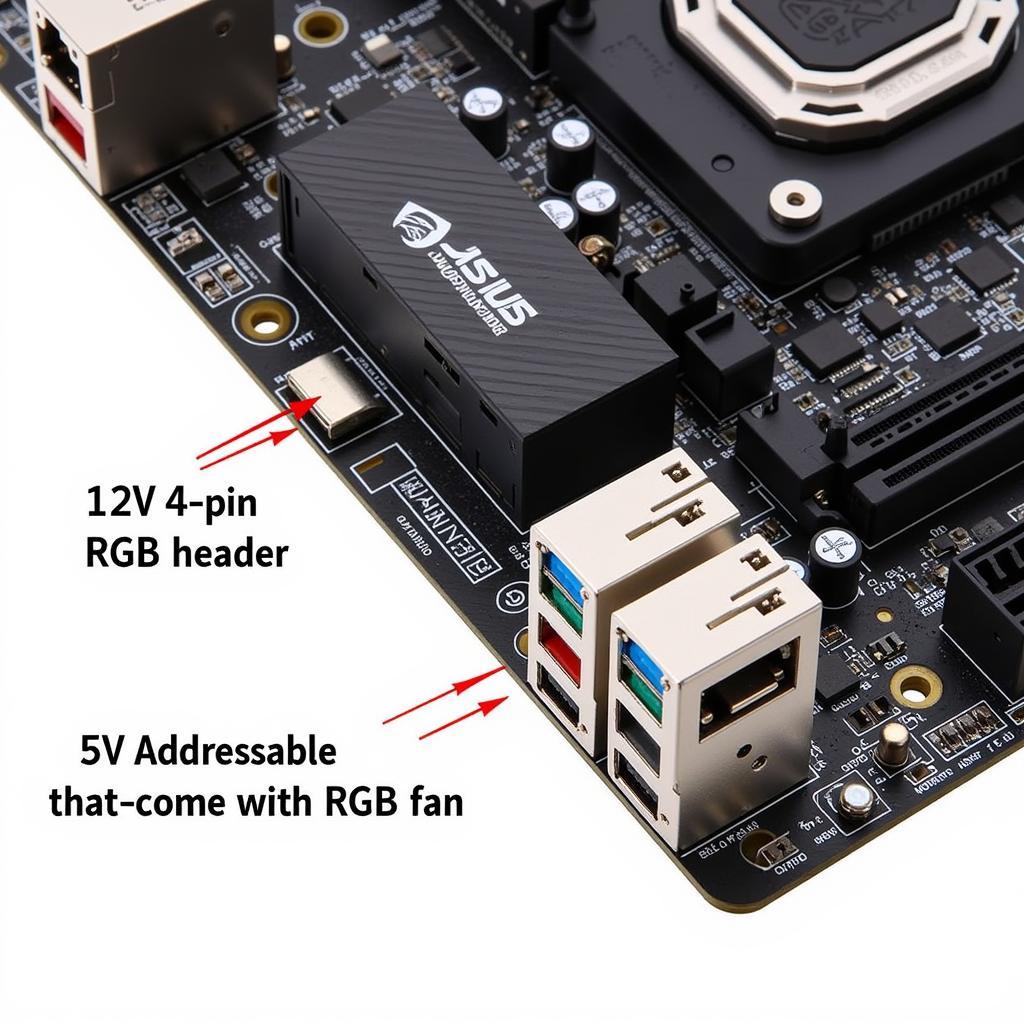 ASUS Motherboard RGB Headers
Note: The specific headers and their locations may vary depending on your motherboard model. Refer to your motherboard’s manual for precise information.
Matching Your Fan Connector
Your RGB fan will have either a 4-pin or 3-pin connector. Ensure that it matches the corresponding header on your motherboard.
- Mismatching connectors can potentially damage your components.
Connecting Your RGB Fan
Once you’ve identified the correct header and connector:
- Power Down Your PC: Always ensure your PC is completely powered off and unplugged from the power source before making any connections.
- Locate the RGB Header: Consult your motherboard manual to locate the appropriate RGB header.
- Align and Connect: Align the arrow mark on the fan’s connector with the +5V or +12V pin on the motherboard header. Gently push the connector in until it clicks into place.
- Connect the Fan to a Fan Header: Connect your RGB fan to a SYS_FAN header on your motherboard for power.
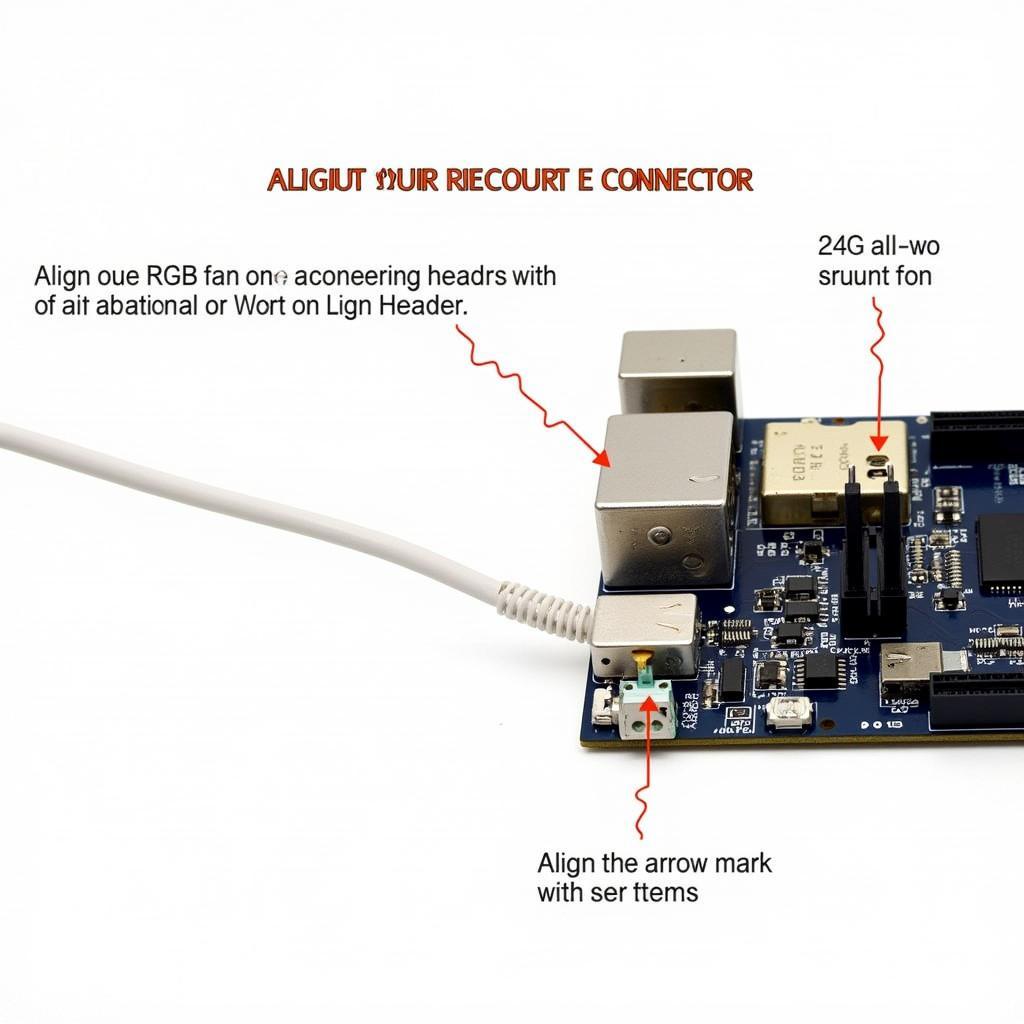 Connecting RGB Fan to Header
Software Control: Unleashing the Spectrum
With your RGB fan successfully connected, it’s time to take control of the lighting using ASUS’s intuitive software.
- Download ASUS Aura Sync: Visit the ASUS support website and download the latest version of Aura Sync software compatible with your motherboard.
- Install and Launch: Install Aura Sync and launch the application.
- Customize Your Lighting: Explore the intuitive interface to customize your RGB fan’s lighting effects, colors, and synchronization with other Aura Sync compatible devices.
4 pin rgb header to system fan
Troubleshooting Tips
Encountering issues? Here are some quick fixes:
- No Lighting: Verify that the RGB fan is receiving power and that the connector is securely attached.
- Incorrect Lighting Behavior: Ensure you’re using the correct header and that your Aura Sync software is up to date.
Frequently Asked Questions
Can I connect a 3-pin ARGB fan to a 4-pin RGB header?
No, connecting incompatible headers can damage your components.
My RGB fan isn’t detected in Aura Sync. What should I do?
Check your connections, update your BIOS and Aura Sync software, and consult your motherboard’s manual.
Conclusion
Connecting your RGB fan to your ASUS motherboard is a simple yet rewarding process that significantly enhances your PC’s aesthetics. By understanding the types of headers, matching connectors, and utilizing ASUS Aura Sync, you can effortlessly create a visually stunning and personalized lighting experience. Now, power up your system, marvel at the captivating glow, and enjoy the show!
Need Further Assistance? Contact us at Phone Number: 0903426737, Email: fansbongda@gmail.com Or visit us at: Group 9, Area 6, Gieng Day Ward, Ha Long City, Gieng Day, Ha Long, Quang Ninh, Vietnam. Our customer service team is available 24/7 to assist you.
