

Changing the fan on your graphics card might seem daunting, but with the right guidance, it’s a relatively simple process that can significantly improve your gaming experience. This guide will walk you through the entire process, from identifying the need for a fan replacement to completing the installation.
Why Change Your Graphics Card Fan?
Graphics cards are designed to handle demanding tasks, generating a substantial amount of heat in the process. The fan plays a crucial role in keeping the GPU cool and operating efficiently. Over time, the fan can wear out, become noisy, or even fail completely. If you notice any of these signs, replacing the fan might be necessary.
Signs that your graphics card fan needs replacing:
- Excessive noise: A loud, whirring sound from your graphics card is a clear indication that the fan is struggling.
- High temperatures: If your GPU temperature consistently reaches dangerously high levels, it could be a sign of a failing fan.
- Stuttering or crashing: A malfunctioning fan can cause your graphics card to overheat, resulting in game stutters or even system crashes.
The Benefits of Replacing Your Graphics Card Fan
Upgrading your graphics card fan offers several benefits beyond addressing potential problems:
- Improved cooling: A new fan can significantly enhance the cooling performance of your graphics card, lowering temperatures and increasing stability.
- Reduced noise: Replacing a worn-out fan with a quieter model can make your gaming experience more enjoyable.
- Increased lifespan: A well-functioning fan helps protect your graphics card from overheating, extending its lifespan.
Choosing the Right Replacement Fan
Before you begin the process, choosing the right fan is essential. Consider these factors when making your decision:
- Compatibility: Ensure the fan you select is compatible with your specific graphics card model.
- Size: The fan must be the correct size to fit the heatsink on your graphics card.
- Noise level: If noise is a concern, choose a fan with a low dB rating.
- Performance: Some fans offer better airflow and cooling performance than others.
Step-by-Step Guide to Replacing Your Graphics Card Fan
Once you have the right replacement fan, follow these steps to install it:
Step 1: Gather the necessary tools and materials
- Phillips screwdriver: To remove screws from the graphics card.
- Anti-static wrist strap: To protect your components from static electricity.
- Replacement fan: The new fan you’ve selected.
- Thermal paste: To ensure proper heat transfer between the GPU and heatsink.
Step 2: Disconnect power and remove the graphics card
- Turn off your computer: Ensure the power is completely disconnected before you begin.
- Remove the side panel of your PC: Access the components inside.
- Disconnect the power cable from your graphics card: This is usually a 6 or 8-pin connector.
- Carefully remove the screws holding the graphics card in place: Be gentle to avoid damaging the motherboard.
Step 3: Remove the old fan
- Locate the screws holding the fan to the heatsink: They are usually on the side or bottom of the fan.
- Carefully remove the screws and detach the old fan: Make sure you don’t lose any of the screws.
- Remove the old thermal paste: You can use a soft cloth or Q-tip to clean the GPU and heatsink.
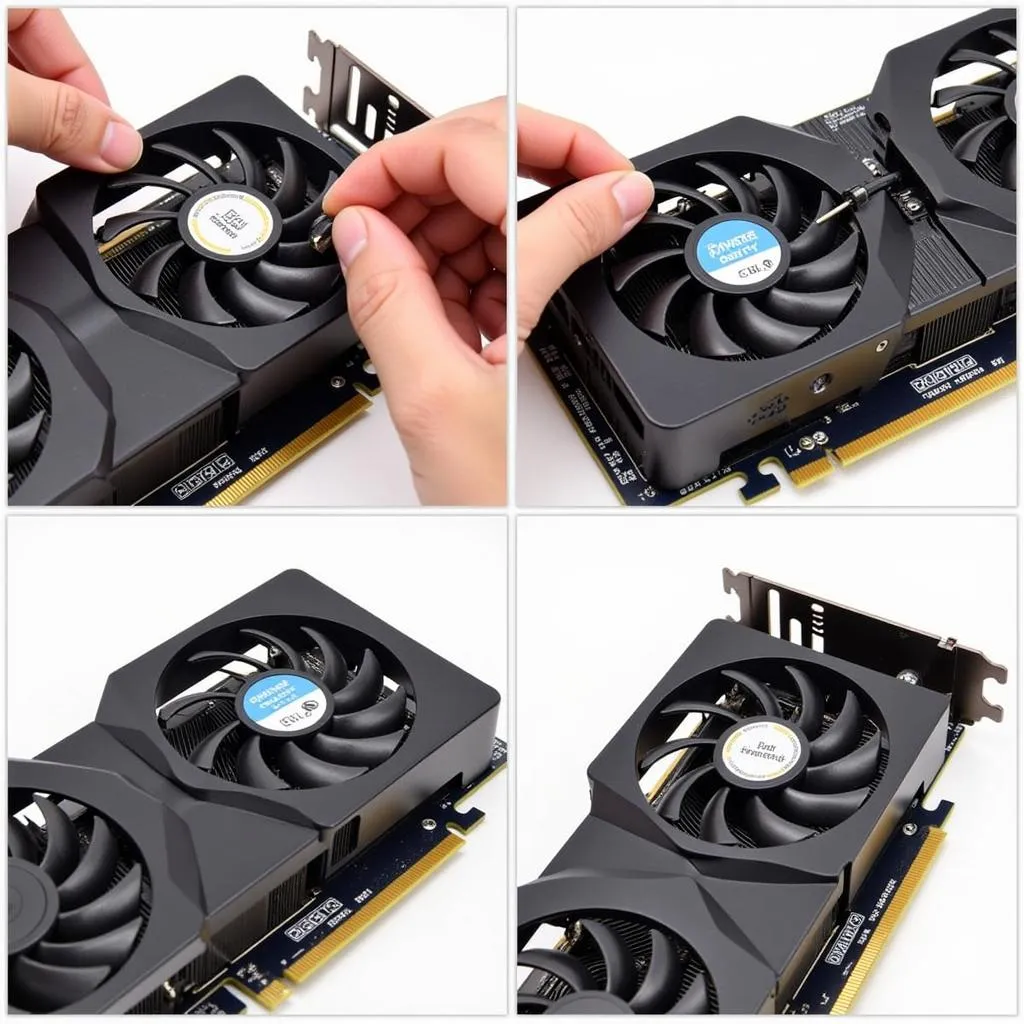
Step 4: Install the new fan
- Apply thermal paste to the GPU: Place a small amount of thermal paste in the center of the GPU.
- Align the new fan with the heatsink: Make sure the fan is properly positioned before securing it.
- Tighten the screws holding the fan in place: Be careful not to overtighten them.
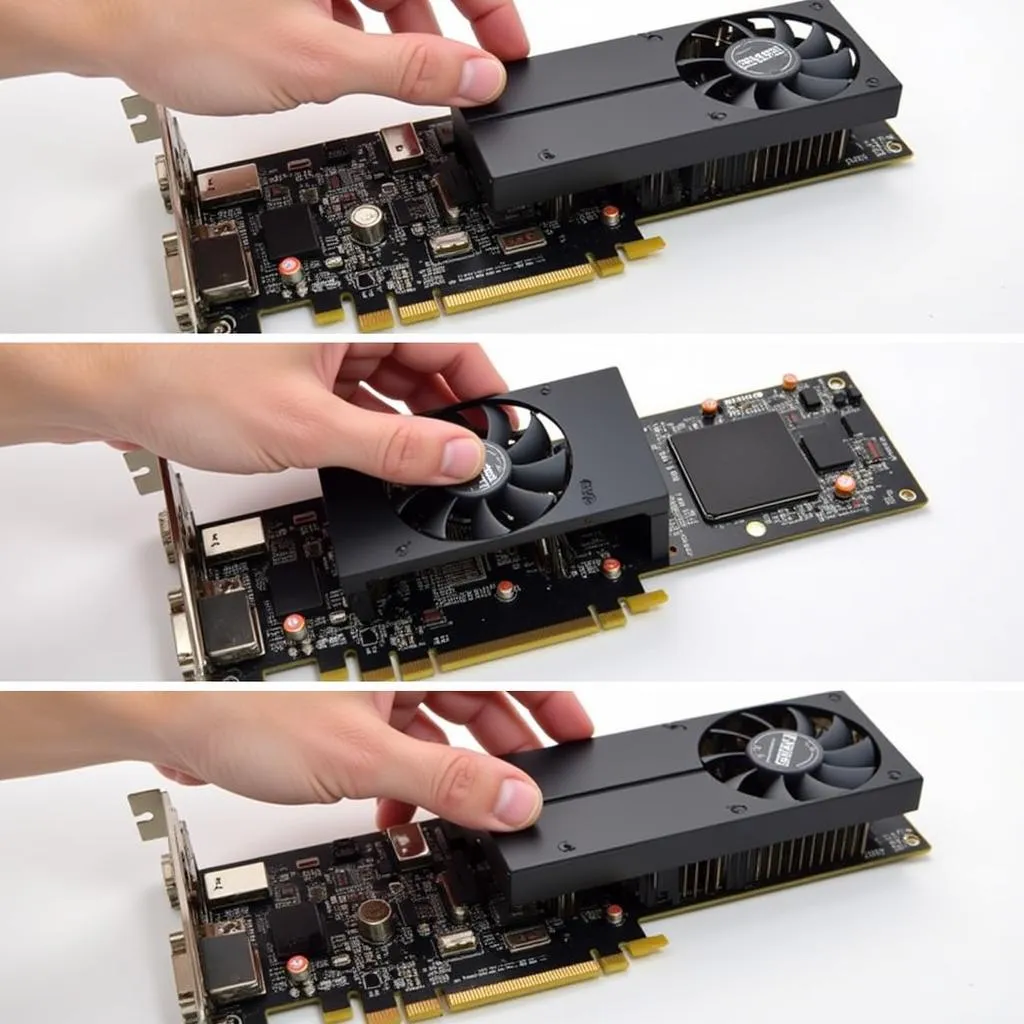 Removing old fan
Step 5: Reinstall the graphics card
- Place the graphics card back in its slot on the motherboard: Ensure it’s properly seated and make sure the bracket fits flush.
- Reconnect the power cable: Ensure it’s securely connected.
- Secure the graphics card with the screws: Tighten them gently.
Step 6: Replace the PC side panel and turn on your computer
- Reinstall the side panel of your PC: Ensure it’s properly secured.
- Turn on your computer: Check if the new fan is working correctly.
Troubleshooting
If your fan doesn’t spin after installation, check the following:
- Power cable: Make sure the power cable is properly connected to the graphics card.
- Fan connection: Double-check that the fan is properly connected to the motherboard or graphics card.
- Fan direction: Ensure the fan is spinning in the correct direction.
- Fan power: Some fans require a separate power connector. Check if your graphics card has one available.
Frequently Asked Questions (FAQs)
Q: Can I replace the fan without removing the graphics card?
A: While it might be possible on some cards, it’s generally not recommended. Removing the graphics card is the safest way to ensure proper installation.
Q: How often should I replace my graphics card fan?
A: The lifespan of a graphics card fan can vary depending on usage and environmental factors. However, it’s generally recommended to replace the fan every 3-5 years.
Q: How do I know if my graphics card needs a new fan?
A: Pay attention to any unusual noise, excessive temperatures, or performance issues. If you suspect a fan problem, it’s best to take action before it causes further damage to your graphics card.
Q: Can I use any type of thermal paste?
A: It’s essential to use high-quality thermal paste specifically designed for electronic devices. Avoid using other types of paste that can damage your components.
 Installing new fan
Q: What are some alternative solutions to replacing the fan?
A: If replacing the fan is not an option, you could consider cleaning the old fan, adjusting the fan curve in your BIOS settings, or using a cooling pad to reduce temperatures.
Q: Can I replace the fan myself?
A: If you’re comfortable with basic computer maintenance and can follow instructions carefully, you can replace the fan yourself. However, if you’re unsure, it’s always best to consult a professional.
Conclusion
Changing the fan on your graphics card can improve cooling performance, reduce noise, and extend the lifespan of your hardware. While the process might seem daunting, with the right tools, materials, and instructions, it can be a relatively straightforward task that you can handle yourself.
By following these steps and taking the necessary precautions, you can ensure your graphics card remains cool and runs smoothly, providing you with a great gaming experience for years to come.
