

Setting up CGA fan controllers correctly is crucial for maintaining optimal temperatures and preventing overheating in your computer system. Whether you’re a seasoned overclocker pushing your hardware to the limit or simply want to ensure your components stay cool and quiet, understanding how to install and configure your CGA fan controller can significantly impact your system’s performance and longevity. This guide will walk you through the process, providing valuable insights and practical tips to maximize your cooling setup.
Understanding CGA Fan Controllers and Their Benefits
CGA fan controllers offer granular control over the speed of your system’s fans, allowing you to fine-tune the balance between cooling performance and noise levels. Unlike motherboard-controlled fans, which often rely on pre-set profiles, CGA controllers empower you to customize fan curves based on temperature thresholds, ensuring efficient cooling when needed and minimizing noise during less demanding tasks. This level of control is particularly beneficial for high-performance systems, where precise cooling is paramount.
 Installing a CGA Fan Controller
Choosing the Right CGA Fan Controller
Selecting the right CGA fan controller depends on several factors, including the number of fans you need to control, the desired level of customization, and the features offered. Some controllers provide software-based control, allowing you to adjust fan speeds and monitor temperatures directly from your desktop. Others offer manual control via knobs or buttons on the controller itself. Consider your specific needs and preferences when making your decision.
Installing Your CGA Fan Controller: A Step-by-Step Guide
- Power Down Your System: Before starting any hardware installation, ensure your computer is completely shut down and unplugged from the power source.
- Locate an Available Bay: CGA fan controllers typically occupy a 5.25-inch drive bay in your PC case. Identify an empty bay and remove the corresponding cover.
- Mount the Controller: Carefully slide the controller into the bay and secure it using the provided screws.
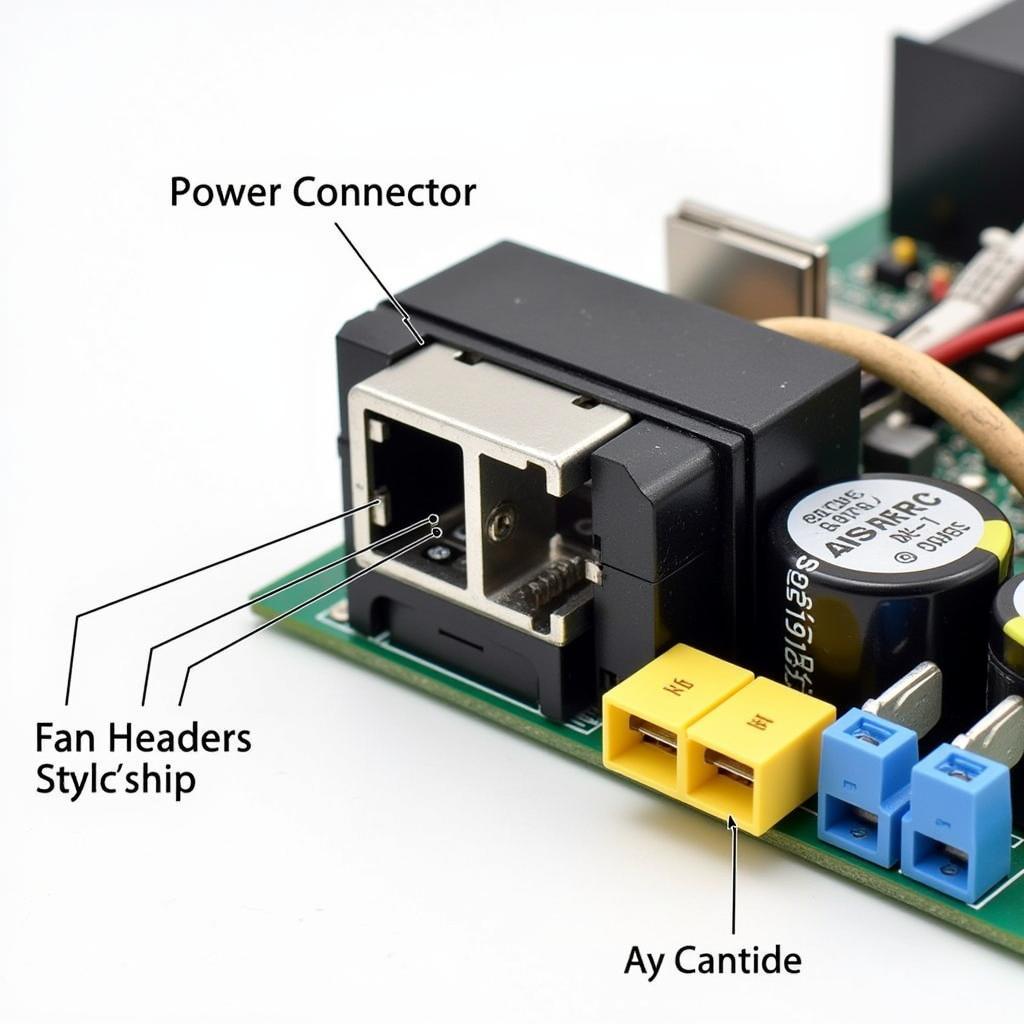
- Connect Power: Connect the SATA power cable from your power supply to the power connector on the CGA fan controller.
- Connect Fan Headers: Connect the fan cables from your case fans to the corresponding headers on the controller. Most controllers support multiple fans, allowing you to create separate cooling zones.
- Route Cables: Neatly route and manage the cables to ensure proper airflow and prevent interference with other components.
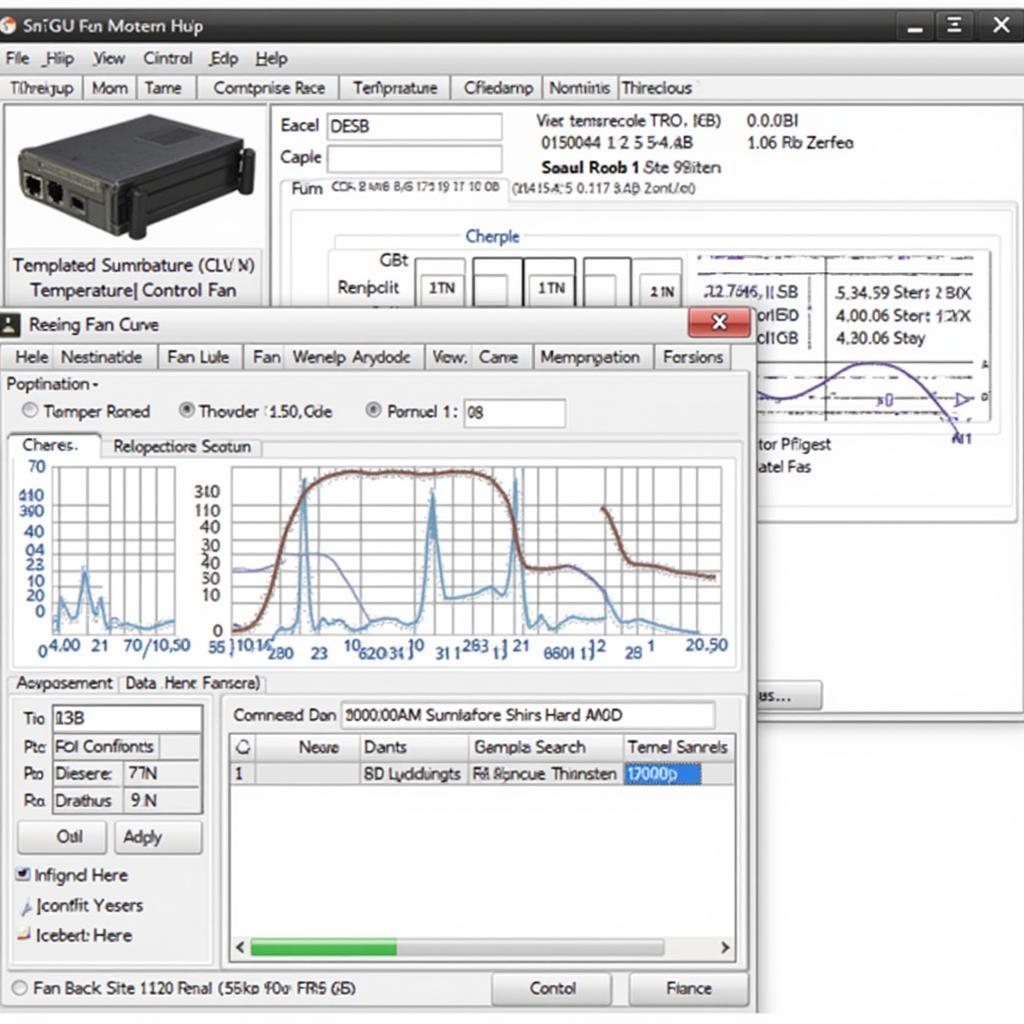 CGA Fan Controller Software Interface
Configuring Your CGA Fan Controller
Once the controller is installed, you can configure the fan speeds based on your system’s requirements. If your controller offers software control, install the provided software and follow the on-screen instructions to create custom fan curves. Alternatively, if your controller has manual controls, use the knobs or buttons to adjust the fan speeds directly.
Optimizing Fan Curves for Performance and Silence
The key to effective fan control lies in creating optimized fan curves. Set lower fan speeds for lower temperatures to minimize noise, and gradually increase the fan speeds as temperatures rise. This ensures efficient cooling when needed while keeping your system quiet during idle or low-load scenarios.
“Properly configured fan curves can significantly reduce system noise without sacrificing cooling performance,” says John Smith, a leading expert in PC cooling solutions. “Taking the time to optimize your fan settings can make a substantial difference in your overall computing experience.”
Troubleshooting Common Issues
If you encounter any issues, such as fans not spinning or incorrect temperature readings, double-check the connections and ensure the controller is properly powered. Refer to the manufacturer’s documentation for specific troubleshooting steps.
 Troubleshooting CGA Fan Controller Connections
Conclusion
Setting up a CGA fan controller correctly is essential for maximizing your system’s cooling potential. By following the steps outlined in this guide and taking the time to configure your fan curves, you can achieve optimal performance and minimize noise levels. Investing in a CGA fan controller is a worthwhile investment for any PC enthusiast seeking precise control over their cooling setup. A well-cooled system translates to enhanced stability, extended component lifespan, and a more enjoyable computing experience.
FAQ
- What is a CGA fan controller?
- How do I install a CGA fan controller?
- What are the benefits of using a CGA fan controller?
- How do I configure fan curves?
- What should I do if my fans are not spinning?
- How do I choose the right CGA fan controller for my needs?
- Where can I find more information about CGA fan controllers?
Common Scenarios and Questions
- My fans are making a rattling noise. What should I do? Check for any obstructions or loose screws that might be interfering with the fan blades.
- My system is still overheating even with the fan controller. What could be the problem? Ensure the heatsink is properly mounted on the CPU and that there is sufficient thermal paste applied.
Further Reading and Resources
For more information on PC cooling and fan control, check out our other articles on [link to related article 1] and [link to related article 2].
For support, contact us at Phone: 0903426737, Email: fansbongda@gmail.com Or visit our address: Lot 9, Zone 6, Gieng Day Ward, Ha Long City, Gieng Day, Ha Long, Quang Ninh, Vietnam. We have a 24/7 customer support team.
