

Removing a CPU fan might seem daunting, but it’s a straightforward process with the right guidance. Whether you’re cleaning, replacing, or troubleshooting your cooling system, this guide will walk you through each step safely and effectively.
Understanding the Importance of CPU Cooling
Before diving into the removal process, let’s understand why CPU fans are crucial. Your CPU generates significant heat, especially during demanding tasks like gaming or video editing. A CPU fan (or cooler) dissipates this heat, preventing overheating and ensuring optimal performance.
Gathering Your Tools
Having the right tools on hand makes the removal process smoother. Here’s what you’ll need:
- Phillips head screwdriver: Most CPU coolers are secured with standard screws.
- Thermal paste remover: Used to clean the old thermal paste from the CPU and cooler.
- Anti-static wrist strap (optional): Protects your components from static electricity.
- A clean, well-lit workspace: This provides ample room and visibility.
Step-by-Step CPU Fan Removal
Follow these steps carefully to remove your CPU fan safely:
-
Power Down and Unplug: Completely shut down your computer and unplug it from the power source.
-
Open the Computer Case: Lay your computer case on its side with the motherboard facing up. Remove the side panel screws and carefully lift the panel off.
-
Locate the CPU Fan: The CPU fan is typically a large, square or circular unit sitting atop the CPU socket.
-
Disconnect the Fan Power Cable: Carefully unplug the fan’s power cable from the motherboard header, usually labeled “CPU_FAN.”
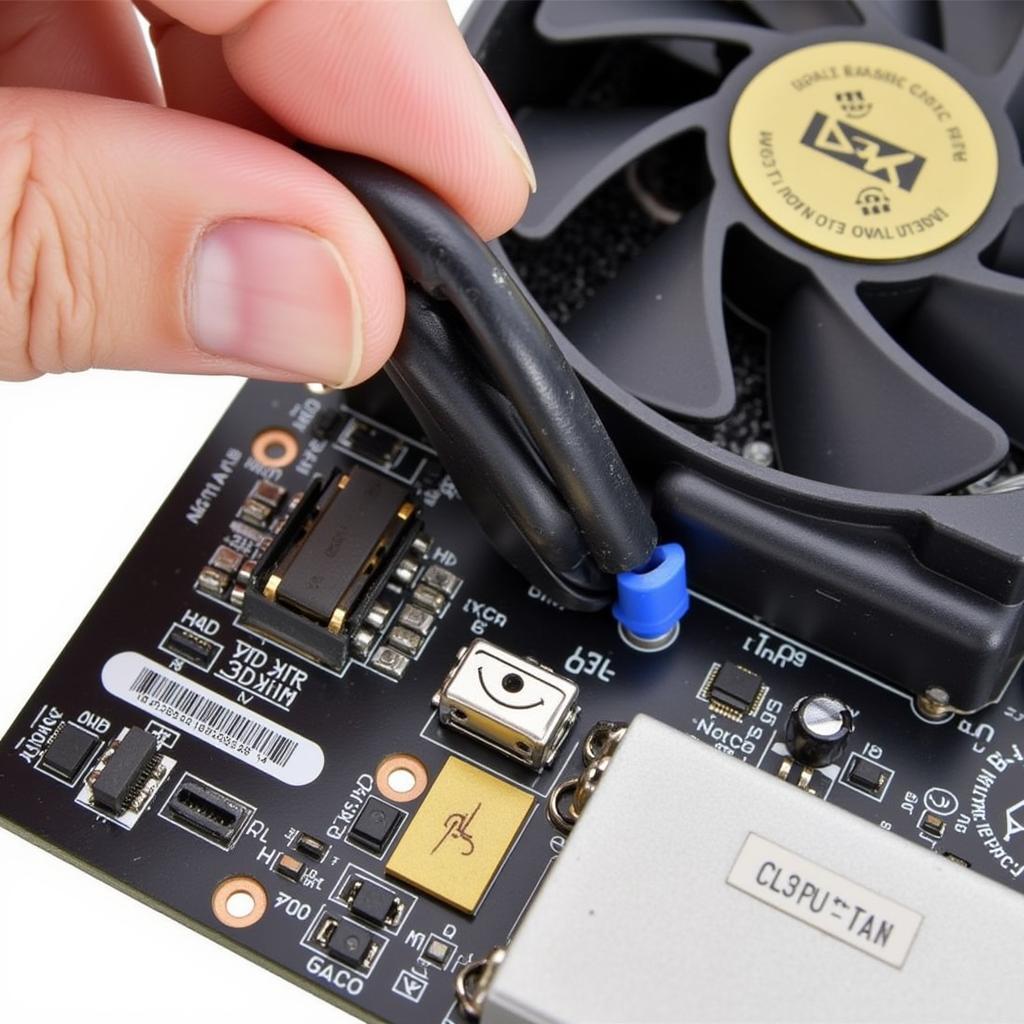 Disconnecting the CPU Fan Power Cable
-
Release the Fan Mounting Mechanism: CPU fans use different mounting mechanisms. Some have clips, while others use screws.
- Clips: Gently press down or squeeze the clips on the fan’s mounting bracket to release them from the motherboard socket.
- Screws: Use your Phillips head screwdriver to loosen and remove the screws securing the fan to the motherboard.
-
Carefully Lift the Fan: Once the mounting mechanism is released, gently lift the CPU fan straight up and away from the CPU.
Cleaning and Preparing for Reinstallation
With the CPU fan removed, you can clean the heatsink and CPU using a lint-free cloth and thermal paste remover. Apply a fresh layer of thermal paste (pea-sized amount) to the center of the CPU before reinstalling the cooler.
Conclusion
Removing a CPU fan is an essential skill for anyone looking to maintain or upgrade their computer’s cooling system. By following this step-by-step guide and taking necessary precautions, you can confidently remove your CPU fan and ensure your system stays cool and runs smoothly. Remember to consult your motherboard and CPU cooler manuals for model-specific instructions.
