

An Arduino Computer Fan Controller can transform your PC from a roaring beast into a silent partner, all while keeping your components cool and performing at their best. By leveraging the power of Arduino, you can create a customized cooling solution tailored to your specific needs and preferences. This guide will explore everything you need to know about Arduino computer fan controllers, from the basics to advanced setups, empowering you to build your own and unlock a world of cooling possibilities.
What is an Arduino Computer Fan Controller?
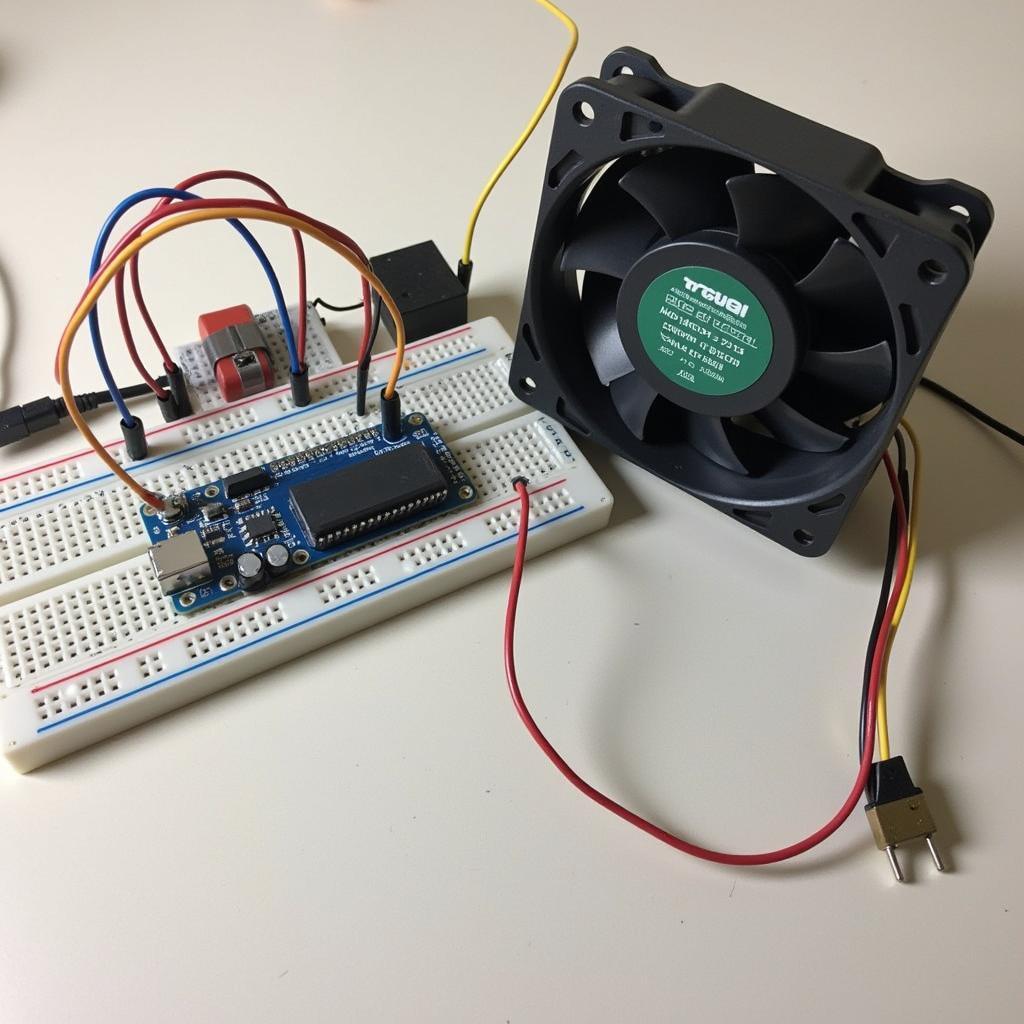 Arduino Fan Controller Setup
At its core, an Arduino computer fan controller is a small electronic circuit that uses an Arduino microcontroller to regulate the speed of your computer fans. Unlike traditional fan controllers that rely on preset profiles, an Arduino-based system allows for dynamic control based on real-time temperature readings. By connecting a temperature sensor to the Arduino, you can program it to adjust fan speeds automatically, ensuring optimal cooling only when needed.
Why Choose an Arduino Fan Controller?
While commercially available fan controllers exist, opting for an Arduino-based solution offers several distinct advantages:
- Customization: Tailor the fan control logic precisely to your preferences. You decide the temperature thresholds, fan curves, and even add extra features like LED indicators or LCD displays.
- Cost-Effectiveness: Building your own controller can be significantly cheaper than buying a pre-built one, especially for multi-fan setups.
- Learning Experience: Delve into the world of electronics and programming, gaining valuable skills while creating a practical project.
- Flexibility: Easily modify and expand your controller in the future to accommodate new hardware or cooling demands.
Essential Components
Before embarking on your Arduino fan controller journey, gather the following essential components:
- Arduino Board: The brain of the operation. Popular choices include the Arduino Uno and Nano.
- Temperature Sensor: Provides real-time temperature data to the Arduino. The DS18B20 digital temperature sensor is a reliable option.
- Transistor(s): Used to control the voltage supplied to the fans, allowing you to adjust their speed. The TIP120 transistor is suitable for most fans.
- Breadboard and Jumper Wires: For prototyping and connecting components.
- Computer Fan(s): Choose fans with compatible connectors and voltage ratings.
- Power Supply: To power the Arduino and fans. A 12V DC power supply commonly used for PC components is ideal.
Building Your First Arduino Fan Controller: A Step-by-Step Guide
Follow these steps to create a simple yet effective Arduino computer fan controller:
- Connect the Temperature Sensor: Wire the DS18B20 sensor to the Arduino according to its datasheet. Typically, this involves connecting the data pin to a digital pin on the Arduino and using resistors for pull-up.
- Connect the Transistor: Connect the base pin of the TIP120 transistor to a digital pin on the Arduino, the collector pin to the positive (+) wire of the fan, and the emitter pin to the ground (GND) of the power supply.
- Connect the Fan: Connect the positive (+) wire of the fan to the collector pin of the transistor and the negative (-) wire to the ground (GND) of the power supply.
- Power Up the Circuit: Connect the Arduino and the power supply.
- Upload the Code: Upload the Arduino sketch (code) that reads the temperature from the sensor and adjusts the fan speed accordingly. Numerous example sketches are available online, which you can modify to suit your needs.
Taking it Further: Advanced Fan Control Techniques
Once you’ve mastered the basics, explore these advanced techniques to enhance your Arduino fan controller:
- Multiple Fan Control: Use multiple transistors to control several fans independently, creating customized cooling zones for your CPU, GPU, and other components.
- PID Control: Implement a Proportional-Integral-Derivative (PID) algorithm to achieve more precise and stable temperature control, minimizing fan speed fluctuations.
- LCD Display: Add an LCD screen to display real-time temperature readings, fan speeds, and other system parameters.
- PWM Control: Employ Pulse Width Modulation (PWM) to control fan speeds digitally, allowing for finer adjustments and potentially quieter operation.
Troubleshooting and Tips
- Double-Check Connections: Ensure all components are connected correctly and securely. Loose wires can lead to erratic behavior or damage.
- Verify Voltage: Confirm that the power supply and fan voltage ratings are compatible.
- Test Code Incrementally: Upload and test your code in stages, verifying each component’s functionality as you go.
- Monitor Temperatures: Keep a close eye on component temperatures during testing to prevent overheating.
- Start with Conservative Settings: When configuring temperature thresholds and fan curves, begin with conservative values and gradually adjust them to find the optimal balance between cooling and noise.
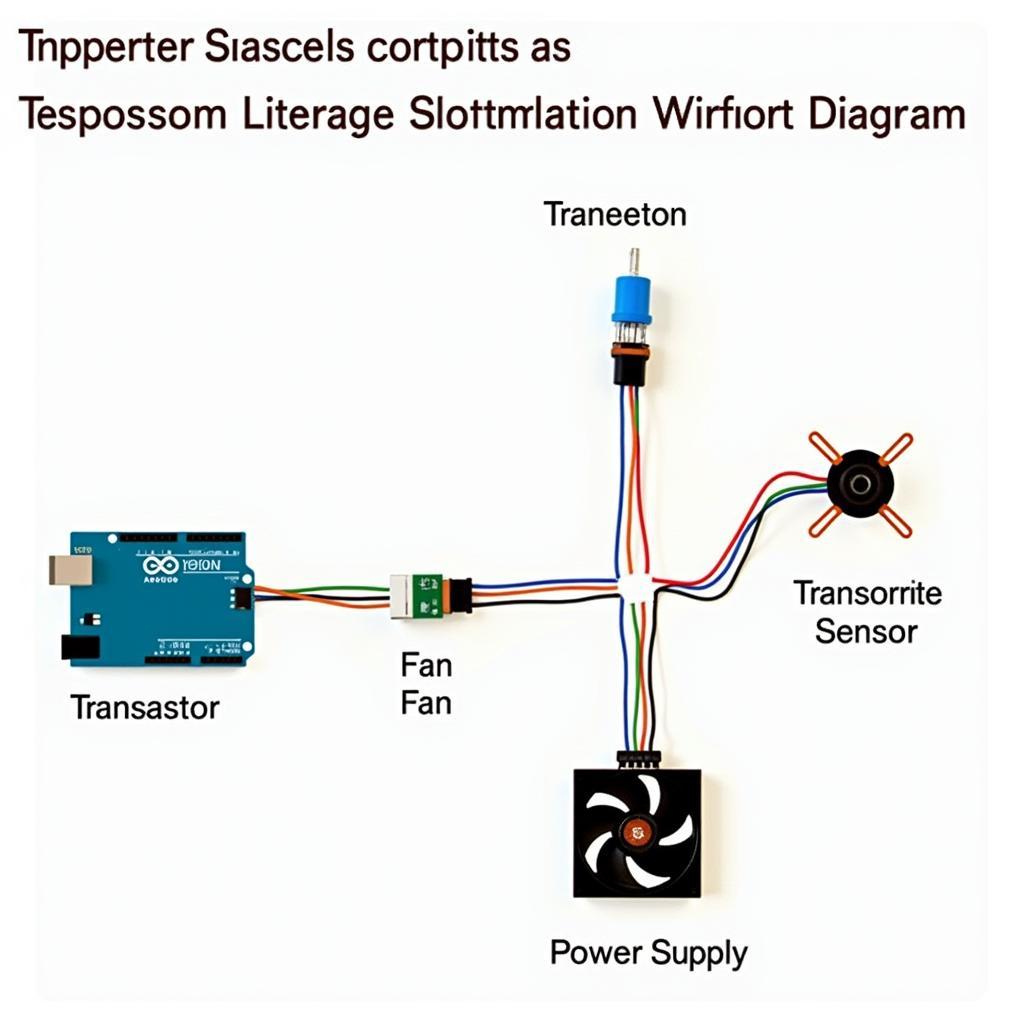 Arduino Fan Controller Wiring Diagram
Conclusion
Building an Arduino computer fan controller is a rewarding project that empowers you to take control of your PC’s cooling. By following this guide and unleashing your creativity, you can create a custom cooling solution that not only keeps your components running smoothly but also adds a personal touch to your system. So, grab your tools, unleash your inner maker, and embark on your Arduino fan controller adventure today!
Expert Insight:
“An Arduino fan controller is a fantastic way to learn about electronics and programming while improving your PC’s cooling. Don’t be afraid to experiment and try different configurations to find what works best for you.” – John Smith, Electronics Engineer
FAQs
1. Can I use any Arduino board for this project?
While most Arduino boards will work, the Uno and Nano are popular choices due to their size and features.
2. What type of fan should I use?
Choose a fan with a compatible connector and voltage rating that matches your power supply.
3. Where can I find Arduino code for my fan controller?
Numerous example sketches are available online, including on the Arduino website and various electronics forums.
4. What is PWM fan control, and why is it beneficial?
PWM stands for Pulse Width Modulation. It allows for digital control of fan speed, resulting in finer adjustments and potentially quieter operation.
5. Can I add more features to my Arduino fan controller?
Absolutely! You can add features like LCD displays, LED indicators, or even remote control functionality.
Need help with your Arduino fan controller project? Contact us at Phone Number: 0903426737, Email: fansbongda@gmail.com. Or visit our office at Tổ 9, Khu 6, Phường Giếng Đáy, Thành Phố Hạ Long, Giếng Đáy, Hạ Long, Quảng Ninh, Việt Nam. We have a 24/7 customer support team ready to assist you.
