

Controlling a 220V fan with Arduino opens up a world of possibilities for customized cooling solutions. Whether you’re building a smart thermostat, a ventilation system, or simply want more control over your existing fan, this guide will provide the knowledge and tools to do so safely and effectively.
Understanding the Challenge: 220V and Arduino
Before diving into the how-to, it’s crucial to acknowledge the inherent danger of working with mains voltage. Arduino boards operate at low voltage (typically 5V) and directly interfacing them with 220V is extremely dangerous and potentially fatal.
Therefore, isolation is paramount. We achieve this by using a relay module – an electrically controlled switch that physically separates the Arduino’s low voltage circuit from the high voltage fan circuit.
Components You’ll Need
- Arduino Board: Any model will do, but Arduino Uno is a great starting point.
- Relay Module: Choose one rated for 220V AC and compatible with your Arduino’s voltage output (usually 5V).
- 220V Fan: Make sure the fan’s current rating matches the relay’s specifications.
- Jumper Wires: For connecting components.
- Breadboard (optional): Helpful for prototyping.
- Suitable Enclosure: For housing the electronics safely once complete.
Wiring the Circuit
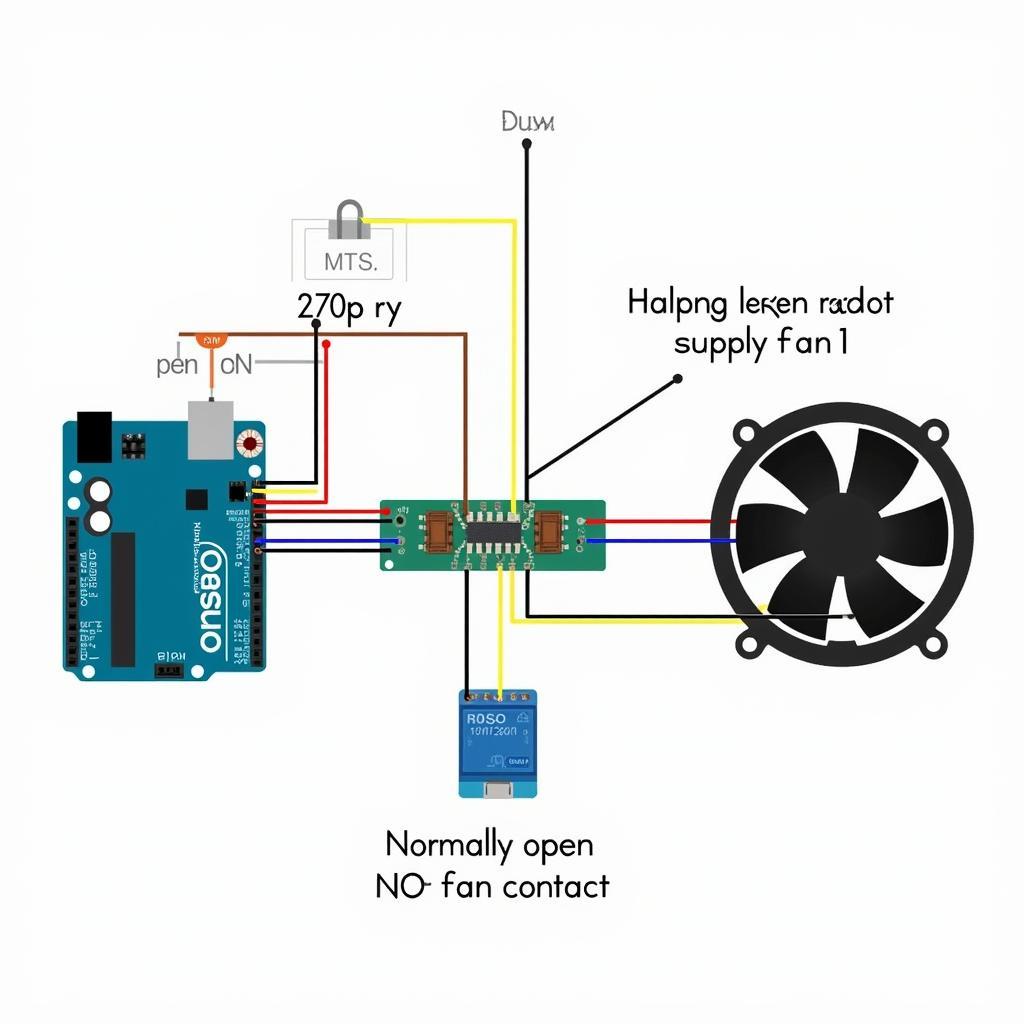 Arduino 220V Fan Control Wiring Diagram
- Connect the Relay Module:
- VCC and GND: Connect to the Arduino’s 5V and GND pins respectively.
- IN: Connect to a digital pin on your Arduino (e.g., pin 7).
- Connect the 220V Supply:
- CAUTION: Disconnect the power before making these connections!
- Connect the Live (L) and Neutral (N) wires of your 220V supply to the relay’s input terminals (usually marked as COM and NC).
- Connect the Fan: Connect the fan’s wires to the relay’s output terminals (COM and NO).
Arduino Code: Controlling the Fan
const int relayPin = 7; // Pin connected to the relay's IN pin

void setup() {
  pinMode(relayPin, OUTPUT);
}

void loop() {
  // Turn the fan ON
  digitalWrite(relayPin, HIGH);
  delay(5000); // Keep the fan on for 5 seconds

  // Turn the fan OFF
  digitalWrite(relayPin, LOW);
  delay(5000); // Keep the fan off for 5 seconds
}
This simple code demonstrates basic ON/OFF control. You can modify the delay() values to adjust the on/off durations.
Advanced Control Techniques
- PWM (Pulse Width Modulation): By rapidly switching the relay ON and OFF, you can simulate different fan speeds. However, frequent switching can shorten the relay’s lifespan, so consider using a solid-state relay for this purpose.
- Temperature Control: Add a temperature sensor (e.g., DHT11, DS18B20) to your circuit and modify the code to turn the fan on/off based on the temperature readings.
- Web Interface: Implement a web server on your Arduino using an Ethernet shield or WiFi module. This allows you to control the fan remotely through a web page.
Safety First: Essential Precautions
- Always disconnect power before making any wiring changes.
- Enclose all electronics in a suitable, non-conductive enclosure.
- Double-check all connections before applying power.
- If you’re unsure about any aspect, consult a qualified electrician.
Conclusion
Controlling a 220V fan with Arduino provides an excellent platform for building customized cooling solutions. Remember to prioritize safety and follow the guidelines outlined above. With a little ingenuity and the power of Arduino, you can create tailored cooling systems for a wide range of applications.
FAQ
1. Can I use any relay module for 220V?
No. Ensure the relay module you choose is explicitly rated for 220V AC and can handle the fan’s current draw.
2. What is PWM and why is it useful for fan control?
PWM simulates different fan speeds by rapidly turning it ON and OFF. It’s energy-efficient but frequent switching can wear down mechanical relays.
3. Is it safe to touch the circuit while it’s powered?
Absolutely not! Never touch any part of the circuit while it’s connected to 220V. Always disconnect power before making any adjustments.
4. My fan isn’t turning on. What could be wrong?
Double-check your wiring, ensure the relay is functioning correctly, and verify that the Arduino code is uploading and running as expected.
5. Can I control multiple fans with one Arduino?
Yes, you can use multiple relays to control multiple fans independently. Just make sure your Arduino has enough digital output pins.
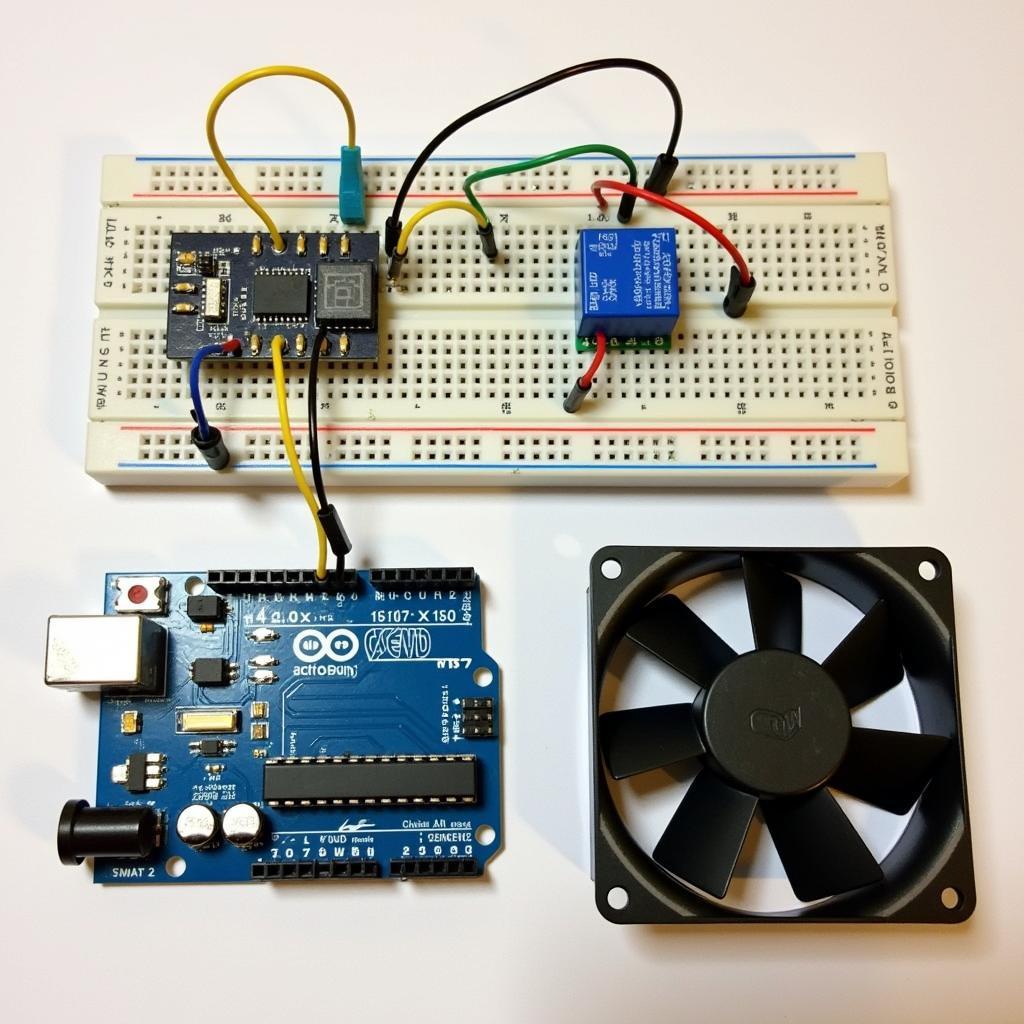 Arduino Uno Controlling a Fan with a Relay Module
For further assistance or information regarding your specific fan control project, please contact our dedicated support team at 0903426737 or email us at fansbongda@gmail.com. Our team is available 24/7 to provide personalized guidance and support. You can also visit us at our address: Tổ 9, Khu 6, Phường Giếng Đáy, Thành Phố Hạ Long, Giếng Đáy, Hạ Long, Quảng Ninh, Việt Nam.
