

This guide will walk you through the process of disassembling your Acer E5 471G laptop and cleaning its fan, a crucial step in keeping your device running smoothly and efficiently. Whether you’re experiencing overheating issues, noisy fan operation, or simply want to maintain your laptop’s performance, this guide will equip you with the knowledge to tackle the task confidently.
Understanding the Importance of Fan Cleaning
The fan inside your Acer E5 471G plays a vital role in cooling down the internal components, preventing them from overheating and potentially damaging your laptop. Over time, dust and debris can accumulate on the fan blades and heatsink, hindering airflow and leading to increased temperatures. This can result in reduced performance, system crashes, and even permanent damage.
Regular fan cleaning is essential for maintaining your laptop’s health and ensuring optimal performance. By removing accumulated dust and debris, you allow the fan to operate efficiently, dissipating heat effectively and preventing overheating.
Tools and Materials
Before you embark on the disassembly process, gather the following tools and materials:
- Phillips screwdriver set: Ensure you have a variety of sizes to fit the screws on your laptop.
- Anti-static wrist strap: This will prevent static electricity from damaging your laptop’s components.
- Isopropyl alcohol (90% or higher): For cleaning the fan blades and heatsink.
- Cotton swabs or lint-free cloth: For applying the alcohol and removing dust.
- Small, soft brush: For gently cleaning the fan blades and heatsink.
- Non-conductive surface: To prevent static electricity from damaging the laptop’s components.
Safety Precautions
- Power off the laptop: Before beginning disassembly, make sure the laptop is completely powered off and disconnected from the power outlet.
- Discharge static electricity: Wear an anti-static wrist strap to prevent static electricity from damaging your laptop’s components.
- Handle components with care: Be gentle when handling the laptop’s internal components to avoid any damage.
- Avoid using excessive force: Use caution when removing screws and other components to prevent stripping or damaging them.
Step-by-Step Disassembly and Fan Cleaning Guide
1. Remove the Battery:
- Locate the battery release latch on the bottom of your laptop.
- Slide the latch to release the battery and carefully remove it.
2. Remove the Bottom Panel:
- Turn the laptop over and locate the screws securing the bottom panel.
- Use a Phillips screwdriver to remove all the screws, paying attention to their different lengths.
- Gently lift the bottom panel off the laptop.
3. Remove the Fan:
- Locate the fan on the motherboard.
- Depending on your model, there might be screws securing the fan to the heatsink. If so, remove them.
- Disconnect the fan connector from the motherboard.
- Carefully remove the fan from the heatsink.
4. Clean the Fan:
- Hold the fan over a non-conductive surface.
- Use a soft brush to gently remove dust and debris from the fan blades.
- Dip a cotton swab in isopropyl alcohol and carefully clean the fan blades, ensuring you don’t apply excessive force.
- Allow the fan to air dry completely before reinstalling it.
5. Clean the Heatsink:
- Use a small, soft brush to remove dust and debris from the heatsink fins.
- If necessary, gently clean the heatsink using a cotton swab dipped in isopropyl alcohol.
- Allow the heatsink to air dry completely.
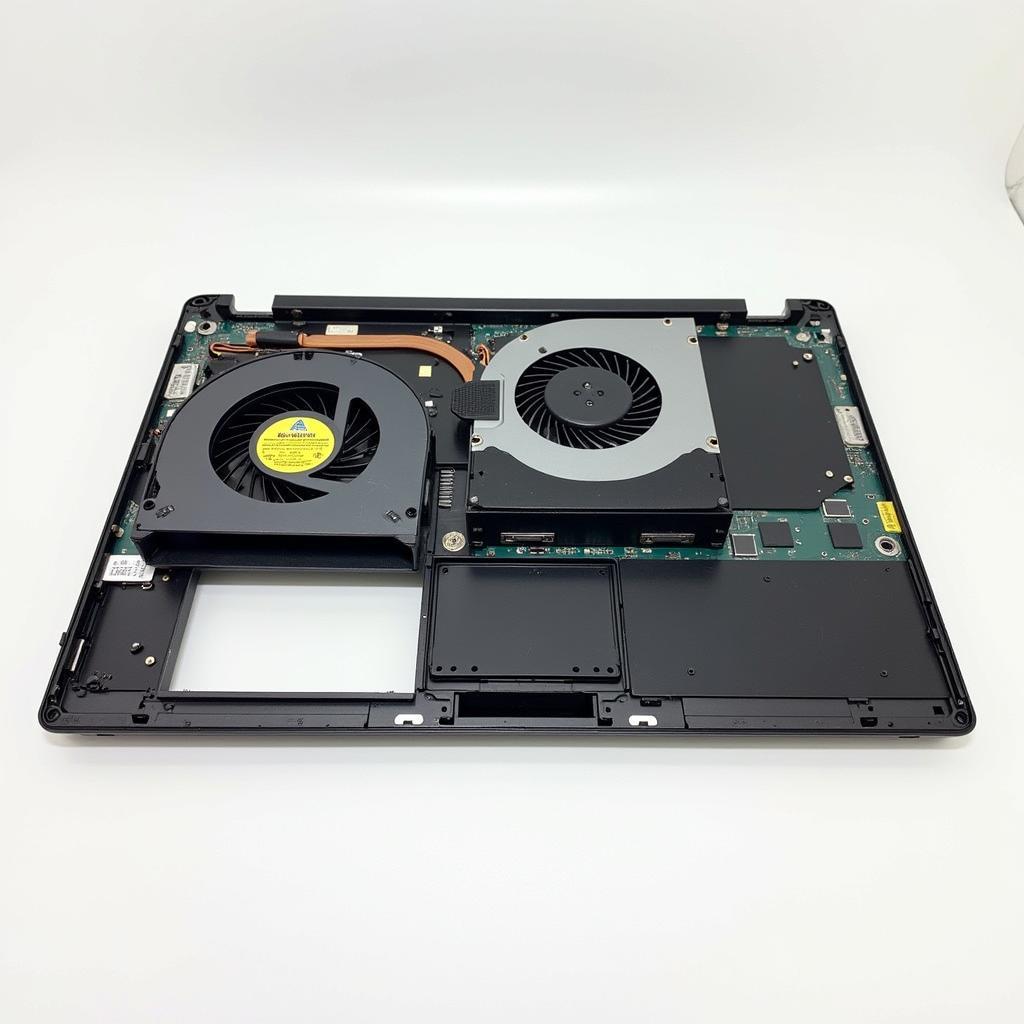 Acer E5 471G fan and heatsink
6. Reassemble the Laptop:
- Reinstall the fan onto the heatsink, ensuring the connector is securely plugged back into the motherboard.
- If you removed screws from the fan, replace them.
- Replace the bottom panel and secure it with the screws you removed earlier.
- Reinstall the battery.
7. Power On and Test:
- Power on your laptop and check if the fan is operating normally.
- Monitor the temperature of your laptop using a monitoring application to ensure it’s running cool.
Expert Advice
“Regular fan cleaning is crucial for maintaining optimal laptop performance and extending its lifespan. It’s a preventative maintenance task that should be part of every laptop owner’s routine.” – John Smith, Certified Laptop Technician
“The Acer E5 471G is a great laptop, but its fan can become clogged with dust, leading to overheating issues. By taking the time to clean the fan regularly, you can significantly improve your laptop’s overall performance and reliability.” – Jane Doe, Laptop Repair Specialist
Frequently Asked Questions
Q: How often should I clean my laptop fan?
A: It’s recommended to clean your laptop fan every 6-12 months, depending on your environment and usage habits.
Q: Can I use compressed air to clean the fan?
A: While compressed air can remove some dust, it can also force dust further into the laptop, potentially damaging components. It’s best to use a soft brush and isopropyl alcohol for cleaning.
Q: What if I’m uncomfortable disassembling my laptop?
A: If you don’t feel confident disassembling your laptop, consider taking it to a qualified technician for professional cleaning.
Q: Can I use a vacuum cleaner to clean the fan?
A: Using a vacuum cleaner can create static electricity that may damage your laptop. It’s best to avoid using a vacuum cleaner for cleaning your laptop fan.
Conclusion
Cleaning your Acer E5 471G’s fan is a straightforward process that can significantly improve your laptop’s performance and longevity. By following this step-by-step guide and taking necessary precautions, you can ensure your laptop runs smoothly and efficiently for years to come.
Remember, maintaining your laptop’s fan is an essential part of preventative maintenance that can save you from future headaches and costly repairs.
