

The allure of a Dyson bladeless fan is undeniable: sleek design, whisper-quiet operation, and a unique airflow mechanism. But the hefty price tag can be a deterrent. What if you could capture that same cutting-edge cooling power with a Homemade Dyson Bladeless Fan? This comprehensive guide dives into the mechanics, benefits, and provides a step-by-step process to build your very own version.
Deconstructing the Dyson: How Does It Work?
Before we embark on our DIY journey, it’s crucial to grasp the ingenious technology behind a bladeless fan. Unlike traditional fans that rely on rotating blades to push air, the Dyson utilizes a principle called “air multiplication.”
- Base Unit: The base houses a powerful motor that draws air in.
- Air Multiplier: The drawn-in air is then channeled through a hollow ring (the iconic loop) with a precisely engineered internal ramp.
- Induced Airflow: This design creates an area of low pressure, drawing in surrounding air and amplifying the airflow up to 15 times.
This clever system results in a smooth, powerful, and consistent breeze, devoid of the choppy air associated with conventional fans.
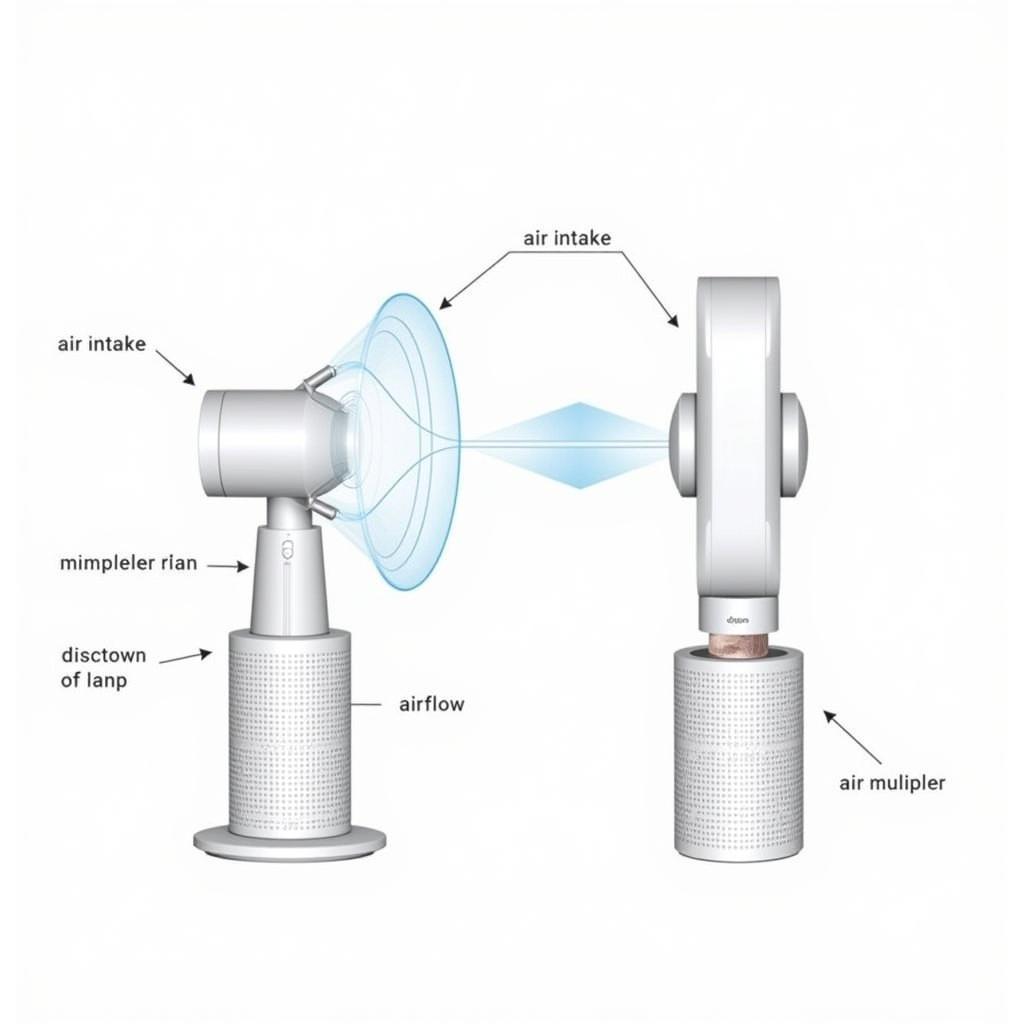 Dyson bladeless fan components diagram
Why Go Homemade?
Choosing to build a homemade Dyson bladeless fan comes with its own set of advantages:
- Cost-Effectiveness: Sourcing individual components often proves significantly cheaper than purchasing a pre-built Dyson.
- Customization: Tailor the design, size, and power to your liking, using materials and colors that match your aesthetic.
- Educational Value: Gain a deeper understanding of airflow dynamics and engineering principles through a hands-on project.
- Sense of Accomplishment: Experience the satisfaction of building a functional and impressive appliance from scratch.
Gathering Your DIY Arsenal
Before you begin, assemble the following materials and tools:
Materials:
- Base: A sturdy cylindrical container (e.g., a large plastic bottle or a PVC pipe section).
- Fan: A small, high-velocity computer fan (80mm or larger is recommended).
- Air Multiplier Ring: A flexible material that can be formed into a ring (e.g., a plastic bottle, cardboard tube, or foam board).
- Power Source: A suitable AC adapter or battery pack for your chosen fan.
- Connecting Components: Duct tape, hot glue, screws, and connectors as needed.
Tools:
- Cutting Tools: Scissors, utility knife, or a rotary cutter for precise shaping.
- Measuring Tape: Accurate measurements are crucial for optimal airflow.
- Hot Glue Gun: For secure and quick adhesion of certain components.
- Screwdriver: For attaching the fan and other parts.
- Sandpaper: To smooth out rough edges and ensure a clean finish.
 Essential tools and materials for building a bladeless fan.
Constructing Your Own Air Multiplier
Follow these steps to build your homemade Dyson bladeless fan:
- Prepare the Base: Cut an opening in the top of your chosen base container to snugly fit the computer fan. Ensure the fan’s airflow direction aligns with the desired output of your bladeless fan.
- Mount the Fan: Securely attach the fan to the base container’s opening using screws, hot glue, or a combination of both. Ensure a tight seal to prevent air leakage.
- Craft the Air Multiplier Ring: Cut your chosen material to form a ring with a diameter larger than your base container. Experiment with different widths to optimize airflow.
- Create the Internal Ramp: Cut a strip of the same material used for the ring, with a width slightly smaller than the ring’s inner circumference. This strip will act as the internal ramp.
- Assemble the Ring: Attach the internal ramp to the inside of the ring, creating a continuous slope that directs airflow. You can use tape or glue to secure it.
- Connect the Ring to the Base: Carefully position the ring atop the base, ensuring the fan blows air into the ring’s hollow space. Use tape or glue to secure the connection, maintaining a seamless transition for smooth airflow.
 Step-by-step illustration of the assembly process.
Power Up and Enjoy the Breeze
Connect your fan to the power source, switch it on, and experience the refreshing results of your handiwork. You’ve successfully built your own version of a Dyson bladeless fan!
Troubleshooting and Optimization
- Weak Airflow: Ensure all connections are airtight, the fan is powerful enough, and the ring’s size and shape are optimized for efficient air multiplication.
- Excessive Noise: Check for any vibrations or loose parts. Apply damping materials like foam or rubber to minimize noise.
- Uneven Airflow: Adjust the internal ramp’s angle and position to achieve a smoother and more consistent breeze.
By understanding the core principles and investing a bit of time and effort, you can create a homemade Dyson bladeless fan that’s both functional and impressive. So, gather your tools, unleash your creativity, and enjoy the cool rewards of your DIY ingenuity!
