Creating a Fan Cooler Laptop From Scrap materials is a challenging but rewarding project that combines creativity, technical skills, and a touch of ingenuity. This guide will provide you with a step-by-step approach to building your own DIY laptop cooling solution, turning discarded components into a functional and efficient cooling system.
Understanding the Need for Laptop Cooling
Laptops, especially high-performance ones, generate significant heat during operation. Overheating can lead to performance throttling, system instability, and even permanent hardware damage. A well-designed cooling system is essential to maintain optimal operating temperatures and prolong the lifespan of your laptop. This is where a DIY fan cooler can come in handy, providing an extra layer of cooling to keep your system running smoothly.
Why Build a Fan Cooler From Scrap?
Building a fan cooler from scrap allows you to customize the cooling solution to your specific laptop’s needs and provides a sustainable way to repurpose old components. Plus, it’s a fun and educational project!
Gathering Your Scrap Materials
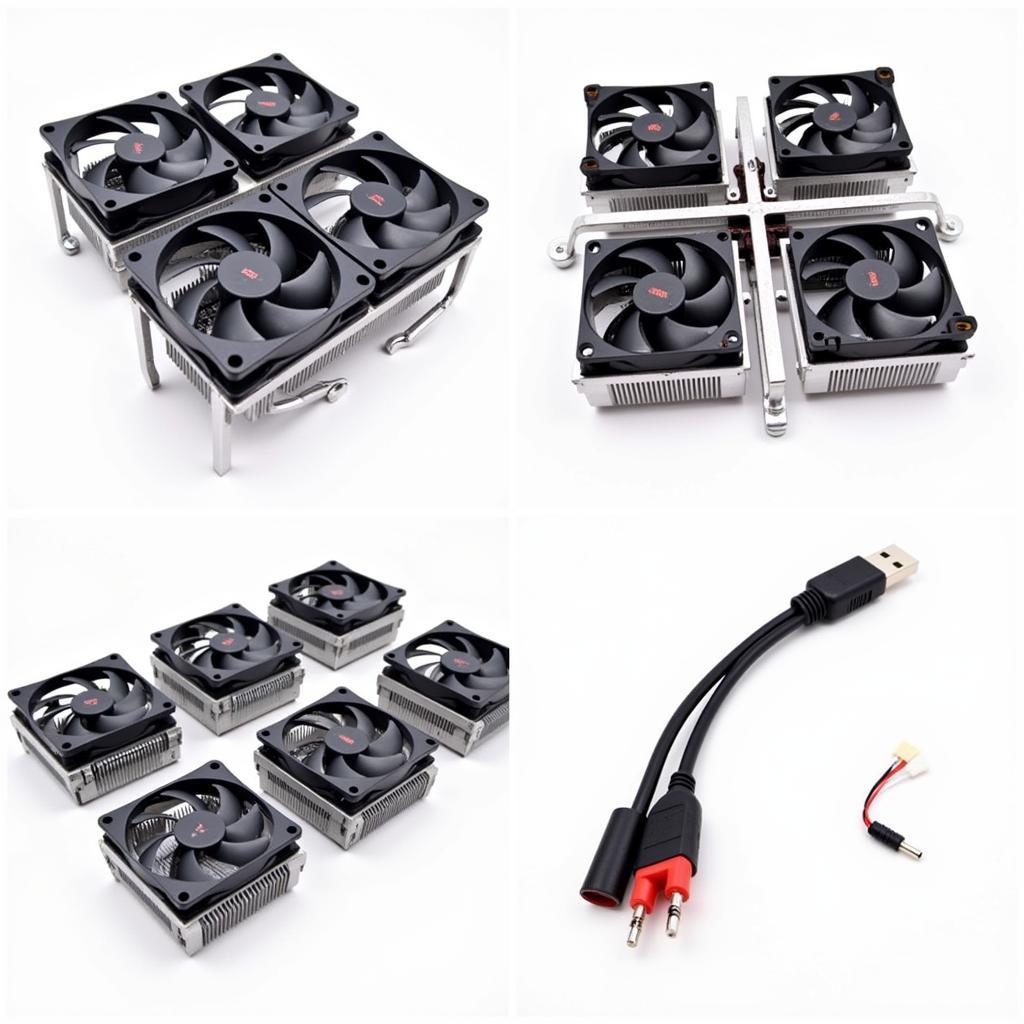
The first step is to gather the necessary scrap materials. Look for old computer fans, heat sinks, plastic or metal sheets, USB cables, and switches. You might be surprised at what you can find around the house or in your local electronics recycling center.
- Fans: Look for fans from old desktop computers, power supplies, or even broken electronics. The size and number of fans will depend on your laptop’s size and cooling requirements.
- Heat Sinks: Aluminum heat sinks from old CPUs or graphics cards can be repurposed to draw heat away from your laptop.
- Chassis Material: Plastic sheets, cardboard, or even thin metal sheets can be used to create the housing for your fan cooler.
- USB Cable: This will power the fans.
- Switch (Optional): A switch allows you to control the fan speed.
Building Your Fan Cooler
Designing the Chassis
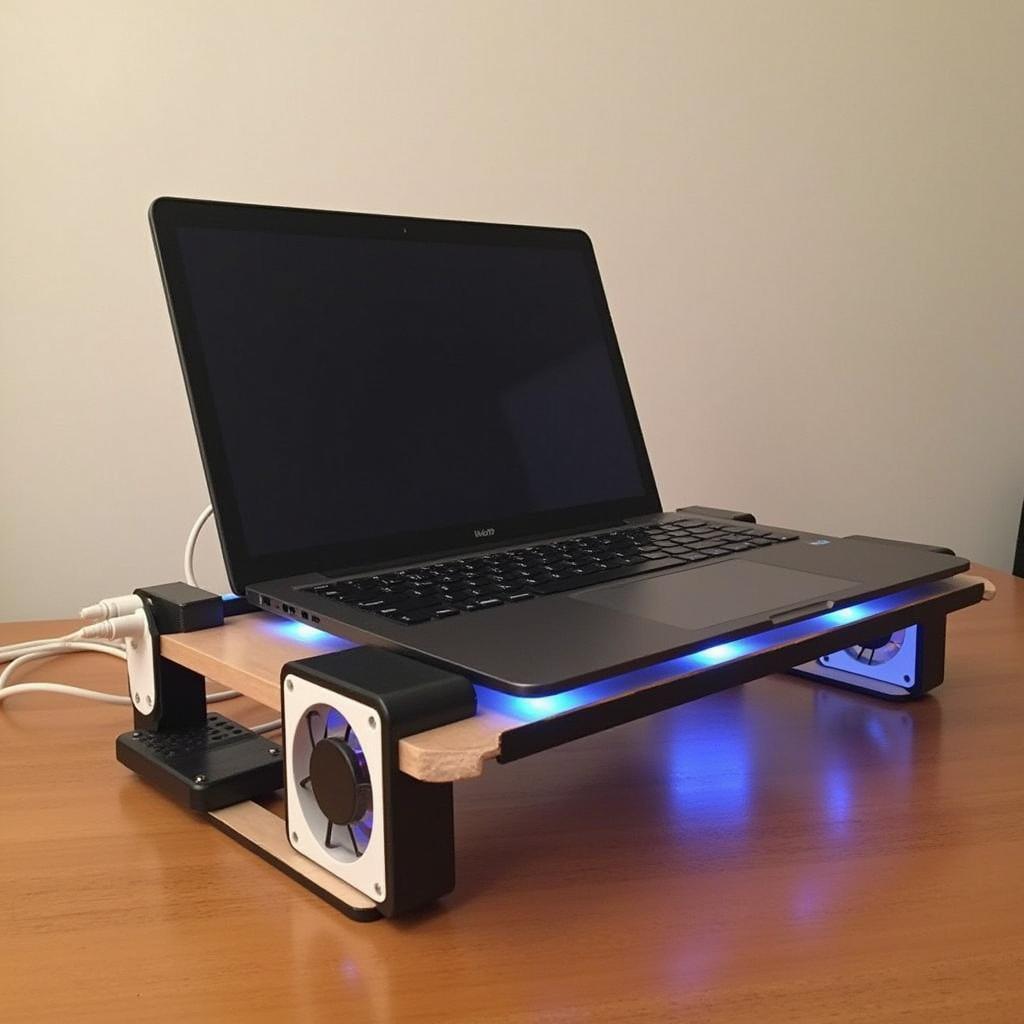
Measure your laptop’s dimensions and design a chassis that will effectively direct airflow towards the hottest areas, usually the bottom or back of the laptop. The chassis should be sturdy enough to support the fans and heat sinks.
Assembling the Components
Attach the fans to the chassis, ensuring they are oriented to draw air away from the laptop. Secure the heat sinks to the chassis in areas that will make contact with the laptop’s hot spots. Wire the fans to the USB cable, and if you’re using a switch, incorporate it into the circuit.
Testing and Refinement
Connect the USB cable to your laptop and test the fan cooler. Monitor your laptop’s temperature during operation to ensure the cooler is effective. Make adjustments to the fan placement or chassis design as needed to optimize cooling performance.
 Assembling the DIY Fan Cooler: Attaching Fans, Heatsinks, and Wiring
Tips for Optimizing Your Fan Cooler
- Airflow: Ensure proper airflow by creating a sealed path between the fans and the laptop.
- Thermal Paste: Applying thermal paste between the heat sinks and the laptop’s surface can improve heat transfer.
- Fan Control: Consider using a fan controller to adjust the fan speed based on your laptop’s temperature.
Conclusion
Building a fan cooler laptop from scrap is a cost-effective and environmentally friendly way to improve your laptop’s cooling performance. By following this guide and using a little creativity, you can create a customized cooling solution that meets your specific needs. Remember to test and refine your design for optimal results. This fan cooler laptop from scrap will keep your system running cool and extend its lifespan.
FAQs
- What type of fans are best for a laptop cooler? Quiet, high-airflow fans are ideal.
- Can I use a phone charger to power the fans? Yes, as long as the voltage and amperage are compatible.
- How do I know if my laptop is overheating? Performance throttling, loud fan noise, and a hot chassis are signs of overheating.
- Is it safe to use a DIY laptop cooler? Yes, as long as it’s properly constructed and doesn’t obstruct airflow.
- How can I improve the cooling performance of my DIY cooler? Optimize airflow and use thermal paste.
 Finished DIY Laptop Cooler in Action
Common Scenarios and Questions:
- My laptop is overheating even with the cooler. Check for dust buildup in the laptop’s vents and consider reapplying thermal paste to the CPU and GPU. You might also consider how to increase fan speed asus laptop if you have an ASUS laptop.
- The fans are too loud. Try using quieter fans or a fan controller to adjust the speed.
Further Resources:
- Check out our article on how to increase fan speed asus laptop for more tips on improving laptop cooling.
For any assistance, please contact us at Phone Number: 0903426737, Email: [email protected] or visit our address: Group 9, Zone 6, Gieng Day Ward, Ha Long City, Gieng Day, Ha Long, Quang Ninh, Vietnam. We have a 24/7 customer service team.


