

Keeping your Lenovo Yoga 510 running smoothly is essential for optimal performance. One crucial aspect of laptop maintenance is regular fan cleaning. Over time, dust and debris can accumulate in the fan and heatsink, hindering airflow and leading to overheating issues. This guide will walk you through the steps involved in cleaning your Lenovo Yoga 510 fan, ensuring efficient cooling and extending the lifespan of your device.
Understanding the Importance of Fan Cleaning
Your laptop’s fan plays a vital role in dissipating heat generated by the processor, graphics card, and other components. When dust builds up, it acts as an insulator, trapping heat and preventing the fan from effectively cooling the system.
This can result in reduced performance, system instability, unexpected shutdowns, and even permanent hardware damage. Regular cleaning helps to maintain optimal airflow, preventing overheating and ensuring your Lenovo Yoga 510 operates at its best.
Tools You’ll Need
Before you begin, gather the following tools to make the cleaning process smoother:
- Small Phillips screwdriver: This will be used to open the laptop’s bottom cover.
- Can of compressed air: Used to blow away dust and debris.
- Anti-static wrist strap: Protects your laptop from electrostatic discharge.
- Soft, lint-free cloth: For wiping away any remaining dust.
- Clean, well-lit workspace: Ensures you can see what you’re doing.
Step-by-Step Cleaning Guide
Step 1: Power Down and Disconnect
Completely shut down your Lenovo Yoga 510 and unplug the power adapter.
Step 2: Access the Fan
Turn the laptop over and locate the screws securing the bottom cover. Using the Phillips screwdriver, carefully remove these screws.
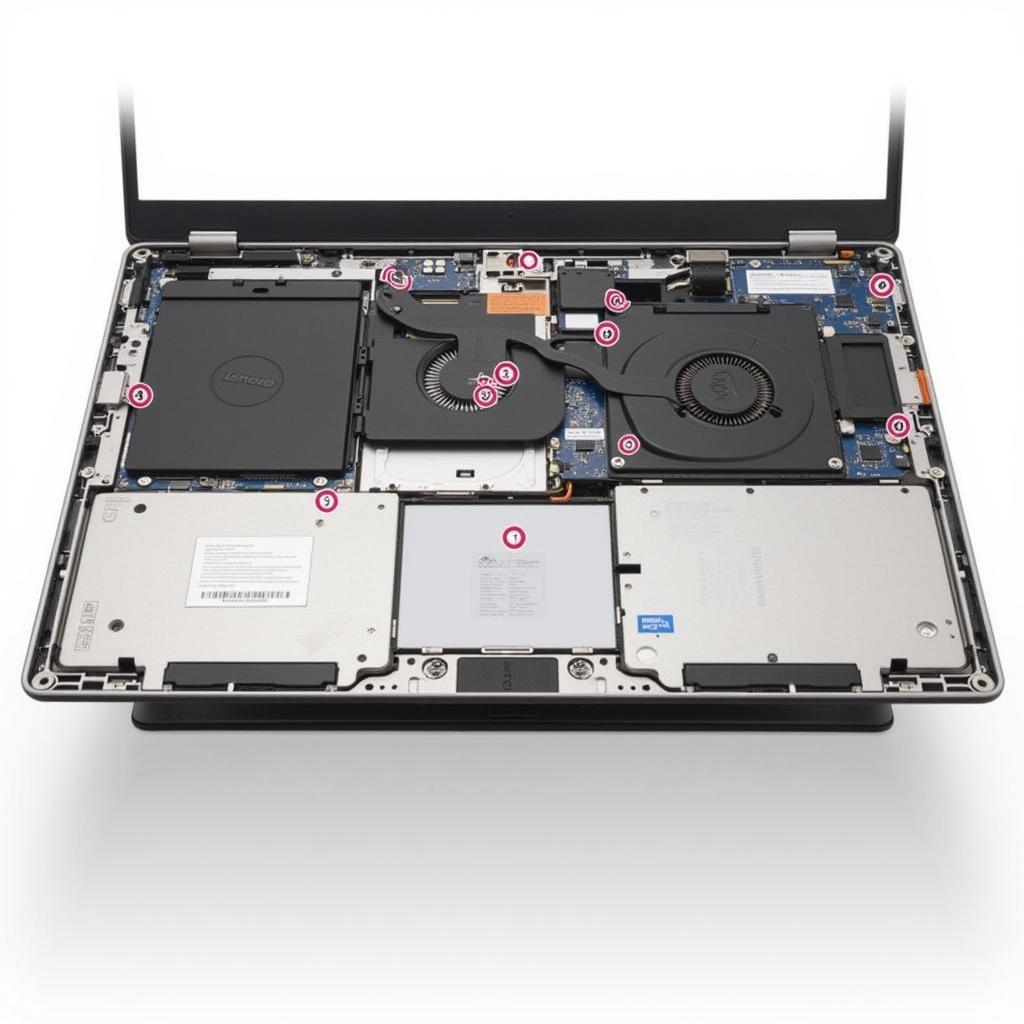 Removing the Bottom Cover of a Lenovo Yoga 510
Once the screws are out, gently pry open the bottom cover. Be cautious not to damage any delicate components.
Step 3: Locate the Fan and Heatsink
The fan is usually a small, square or rectangular component with blades. It is connected to the heatsink, which is a metal block with fins.
Step 4: Use Compressed Air
Hold the can of compressed air upright and use short bursts of air to blow away dust from the fan blades, heatsink, and surrounding areas. Avoid spraying directly onto the fan at close range, as this could cause damage.
Step 5: Gentle Wiping
If any stubborn dust remains, lightly dampen the lint-free cloth and gently wipe the fan blades and heatsink. Ensure the cloth is not too wet, as moisture can damage electronic components.
Step 6: Reassemble Your Laptop
Once the cleaning is complete, carefully align and replace the bottom cover. Secure it in place by re-inserting and tightening the screws.
Tips for Effective Fan Cleaning
- Regularity is Key: Aim to clean your Lenovo Yoga 510 fan every 3-6 months, depending on usage and environment.
- Avoid Over-Tightening: When reassembling, avoid over-tightening the screws, as this can damage the laptop’s casing.
- Seek Professional Help: If you are uncomfortable disassembling your laptop or encounter any difficulties, it is best to seek professional assistance.
Conclusion
Regular fan cleaning is crucial for maintaining the performance and longevity of your Lenovo Yoga 510. By following this comprehensive guide, you can easily clean your laptop’s fan and prevent overheating issues. Remember to prioritize safety and seek professional help if needed. By investing a little time and effort, you can ensure your Lenovo Yoga 510 continues to operate at its best.
