

Connecting case fans to your motherboard might seem daunting at first, but it’s a straightforward process. Whether you’re building a new PC or upgrading an existing one, proper fan installation is crucial for optimal airflow and cooling. This guide will walk you through the steps, ensuring your components stay cool and perform at their best.
Understanding the Basics: Fans and Your Motherboard
Before we dive into the connections, let’s clarify some key components:
- Case Fans: These fans circulate air within your PC case, drawing in cool air and expelling hot air to prevent overheating.
- Motherboard: The central circuit board of your PC, connecting all components, including the CPU, RAM, storage, and peripherals. Importantly, it houses the fan headers.
- Fan Headers: These are groups of pins on the motherboard specifically designed to power and control case fans.
Types of Fan Connectors
Modern motherboards typically offer these common fan connector types:
- 3-Pin Connectors: Providing power and a tachometer signal for fan speed monitoring.
- 4-Pin Connectors: Similar to 3-pin but with an additional pin for Pulse Width Modulation (PWM) control, enabling more precise fan speed adjustments based on temperature.
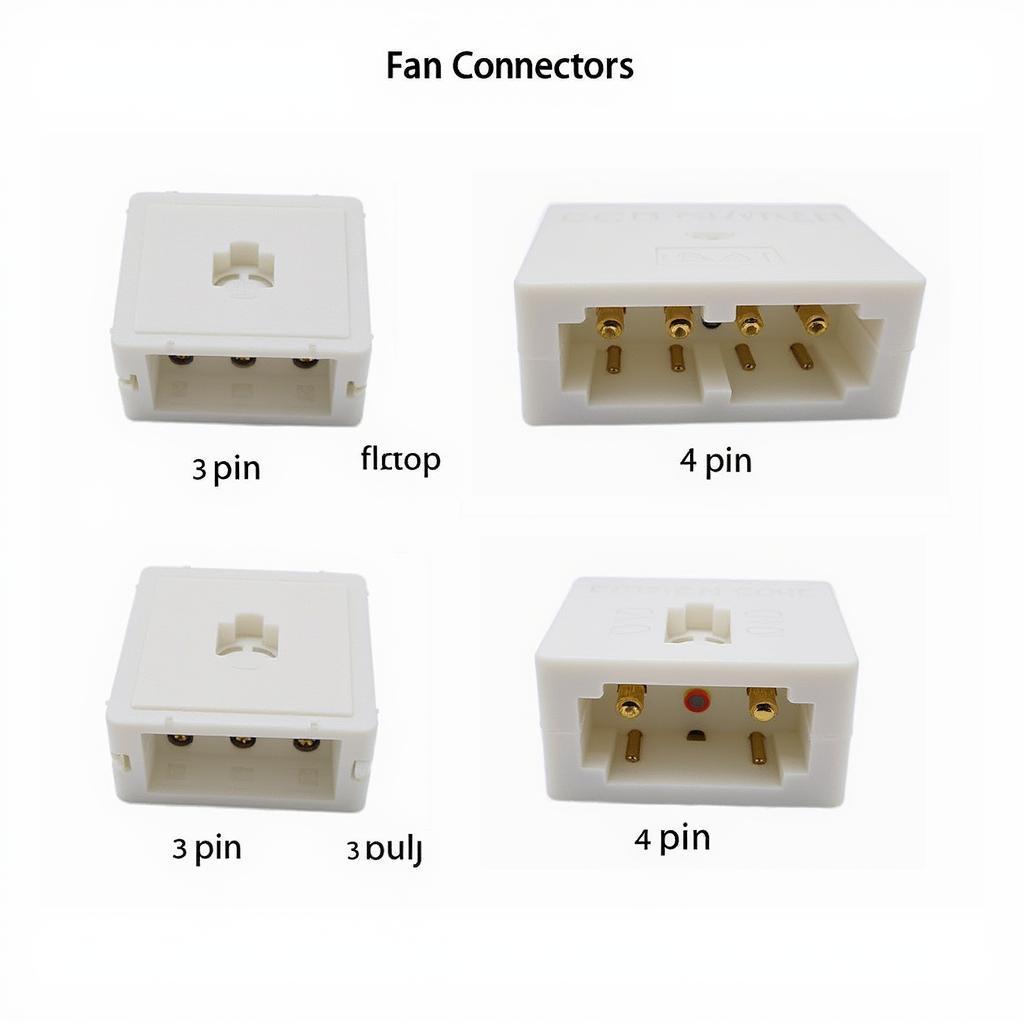 Fan Connectors
Locating Fan Headers on Your Motherboard
The location of fan headers varies depending on the motherboard model. Consult your motherboard manual for precise locations. However, they are commonly found:
- Near the CPU socket: For CPU cooler fans.
- Along the edges of the motherboard: For case fans.
Step-by-Step Guide to Connecting Case Fans
-
Power Down and Unplug: Completely power down your PC and unplug it from the power source.
-
Open Your PC Case: Remove the side panel of your PC case to access the interior.
-
Identify Fan Headers: Consult your motherboard manual to locate available fan headers. They are usually labeled as “SYS_FAN,” “CHA_FAN,” or similar.
-
Align and Connect: Align the notch on the fan connector with the corresponding protrusion on the fan header. Gently push the connector onto the header until it securely clicks into place.
-
Secure the Fan: Use the provided screws to securely mount the fan to the case’s fan mounts. Ensure the fan is oriented correctly for optimal airflow (usually with the fan blades facing inwards or outwards depending on its position).
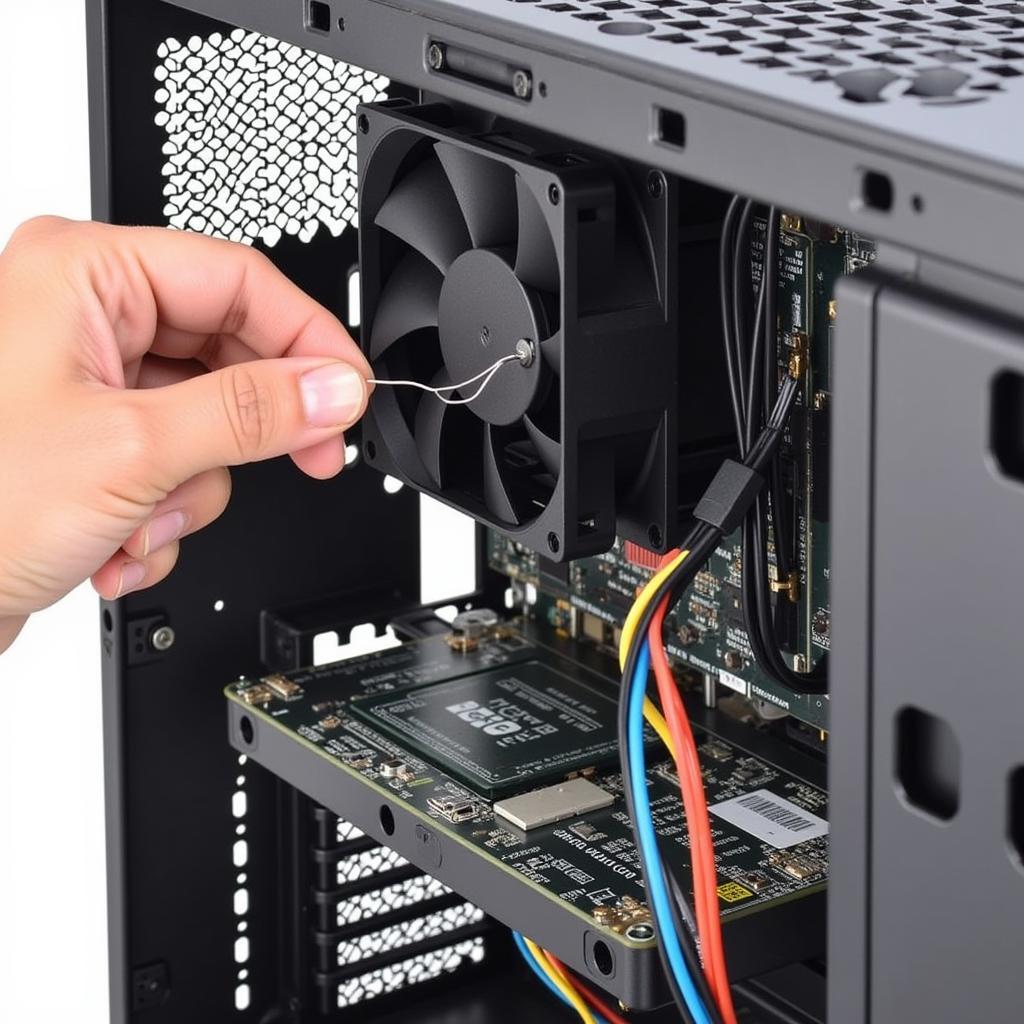 Case Fan Installation
Tips for Optimal Fan Connection
- Fan Header Voltage: Ensure the fan header’s voltage matches your fan’s voltage requirement. Most fans use 12V, but always double-check.
- PWM Control: For fans with 4-pin connectors, connect them to 4-pin headers for PWM control, allowing for automatic fan speed adjustments based on system temperature.
- Fan Orientation: Position intake fans (drawing in cool air) at the front or bottom of the case and exhaust fans (expelling hot air) at the rear or top.
- Cable Management: Neatly route fan cables to prevent airflow obstruction and maintain a clean look inside your PC.
Troubleshooting Fan Connection Issues
-
Fan Not Spinning: Double-check the fan’s power connection and ensure it’s securely connected to the header. Verify the fan header is enabled in the BIOS settings.
-
Noisy Fan Operation: Ensure the fan is properly seated and not obstructed by any cables or components. Adjust fan speed curves in your BIOS or using fan control software.
-
Erratic Fan Behavior: Check for loose connections or damaged fan cables. Consider replacing the fan if the issue persists.
Conclusion
Connecting case fans to your motherboard is a fundamental step in ensuring proper PC cooling and maintaining optimal system performance. By following these simple steps, you can confidently connect your case fans, keeping your components cool and maximizing the lifespan of your PC.
