Controlling a 4-wire fan with an Arduino opens up a world of possibilities for customized cooling solutions. Whether you’re building a PC, a 3D printer enclosure, or any project requiring temperature regulation, understanding 4 Wire Fan Control Arduino is crucial. This article will guide you through the process, from understanding the wiring to writing the code. We’ll cover everything you need to know to get your fan spinning just the way you want it.
Understanding the 4-Wire Fan
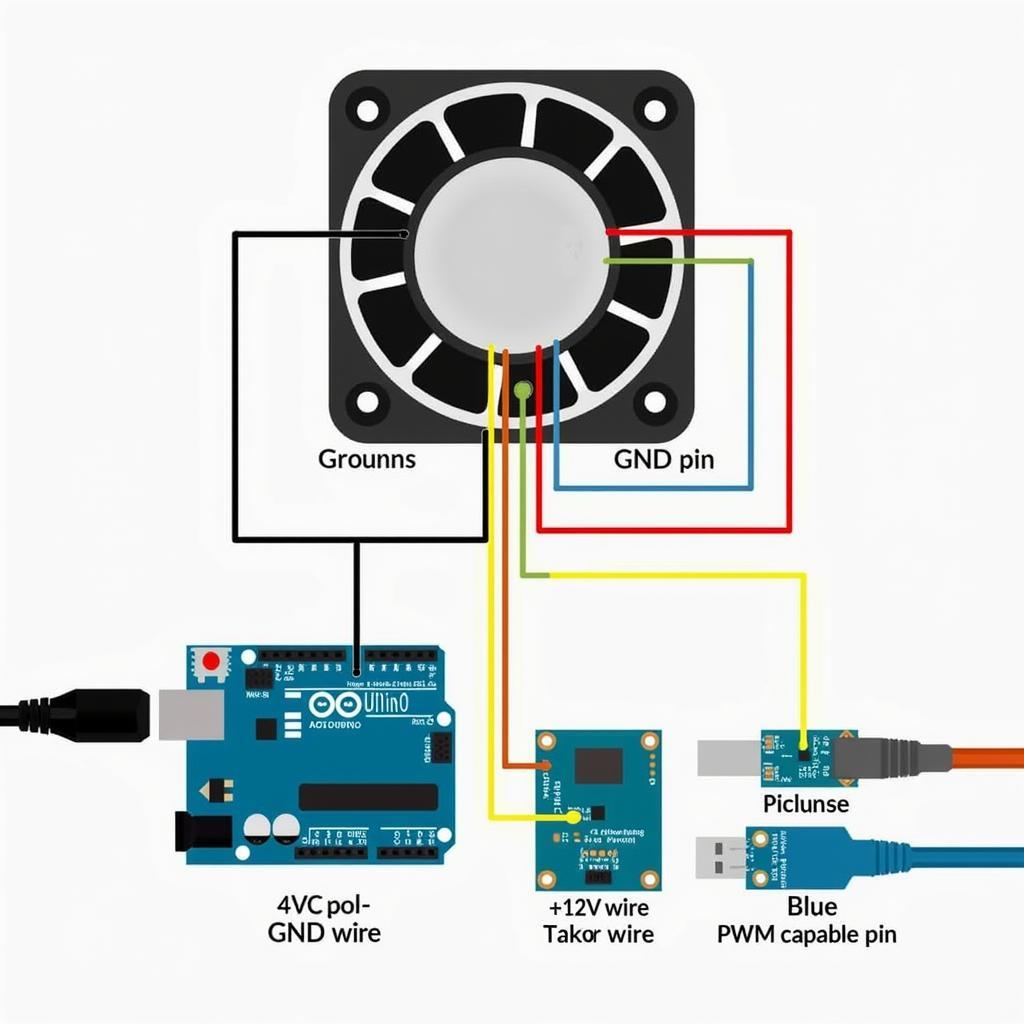
Before diving into the Arduino code, it’s essential to understand the purpose of each wire in a 4-wire fan. These wires typically correspond to Ground, +12V Power, Tachometer (RPM sensing), and PWM (Pulse Width Modulation) control. The Ground and +12V wires provide power to the fan, while the Tachometer wire sends pulses back to the Arduino, allowing you to monitor the fan’s speed. The PWM wire is the key to controlling the fan’s speed; by varying the duty cycle of the PWM signal, you can precisely adjust the voltage supplied to the fan motor.
 4-Wire Fan Connected to Arduino
Wiring the Fan to Your Arduino
Connecting your 4-wire fan to your Arduino is straightforward. The Ground wire of the fan connects to the GND pin on the Arduino. The +12V wire connects to a 12V power supply, not directly to the Arduino. Remember, the Arduino can only supply 5V or 3.3V, depending on the model. The Tachometer wire connects to a digital pin on the Arduino for RPM reading. Finally, the PWM wire connects to a PWM-capable digital pin on the Arduino. Refer to your Arduino board’s documentation for the PWM pin designations. Using an external power supply for the fan is crucial to prevent damage to your Arduino. You might also consider using a transistor to switch the 12V power to the fan, controlled by a digital pin on the Arduino.
Coding for Fan Control
Now for the fun part: writing the Arduino code. You’ll need to configure the PWM pin to output a signal. You can use the analogWrite() function to control the duty cycle of the PWM signal, thus controlling the fan speed. To read the RPM, you can use the pulseIn() function to measure the duration of the pulses coming from the Tachometer wire. 4 wire fan cpu control arduino provides a deeper dive into this specific application.
// Define the pins
const int pwmPin = 9; // PWM pin for fan control
const int tachPin = 2; // Digital pin for tachometer

void setup() {
  pinMode(pwmPin, OUTPUT);
  Serial.begin(9600); // For monitoring RPM
}

void loop() {
  int fanSpeed = analogRead(A0); // Read potentiometer value (0-1023)
  fanSpeed = map(fanSpeed, 0, 1023, 0, 255); // Map to PWM range (0-255)
  analogWrite(pwmPin, fanSpeed); // Control fan speed

  long duration = pulseIn(tachPin, HIGH);
  int rpm = 1000000 / duration / 2; // Calculate RPM
  Serial.println(rpm);

  delay(100);
}
This code reads the value from a potentiometer connected to analog pin A0, maps it to the PWM range, and controls the fan speed accordingly. It also reads the RPM from the tachometer and prints it to the serial monitor. For more advanced control options, consider using a PID controller. An arduino fan controller can be built with various features like temperature-based control.
 Arduino Code for 4-Wire Fan Control
Conclusion
Controlling a 4 wire fan control arduino is a versatile and rewarding project. By understanding the wiring and the code, you can create customized cooling solutions for a wide range of applications. From simple speed control to sophisticated temperature regulation, the possibilities are endless. Don’t forget to check out resources on cpu fan wiring and 4 pin pwm fan pinout for more detailed information.
FAQ
- What is PWM? PWM stands for Pulse Width Modulation, a technique for controlling the average voltage supplied to a device by varying the width of the pulses in a digital signal.
- Why use an external power supply? An external 12V power supply is necessary because the Arduino cannot provide enough current to power the fan directly.
- What is the purpose of the Tachometer wire? The Tachometer wire allows you to monitor the fan’s speed by sending pulses back to the Arduino.
- Can I control multiple fans with one Arduino? Yes, you can control multiple fans by using multiple PWM pins and transistors.
- How do I choose the right transistor? Choose a transistor that can handle the current draw of the fan and is compatible with the Arduino’s voltage levels.
- What are some common applications of 4-wire fan control? Common applications include PC cooling, 3D printer enclosures, and temperature-controlled projects.
- Where can I find more information about Arduino fan control? You can find more information on websites like 3 wire fan light switch diagram.
Need further assistance? Contact us at Phone Number: 0903426737, Email: fansbongda@gmail.com or visit our address: Lot 9, Area 6, Gieng Day Ward, Ha Long City, Gieng Day, Ha Long, Quang Ninh, Vietnam. We have a 24/7 customer support team.


